
TECH420 Blog
PROJECT 1
Week 1
The goal of this project is to integrate an object into our shot plates with animation, as it rolls through light and shadow. I chose to shoot my plates indoors so I could attempt to have static lighting. I plan on rolling an apple through the scene.
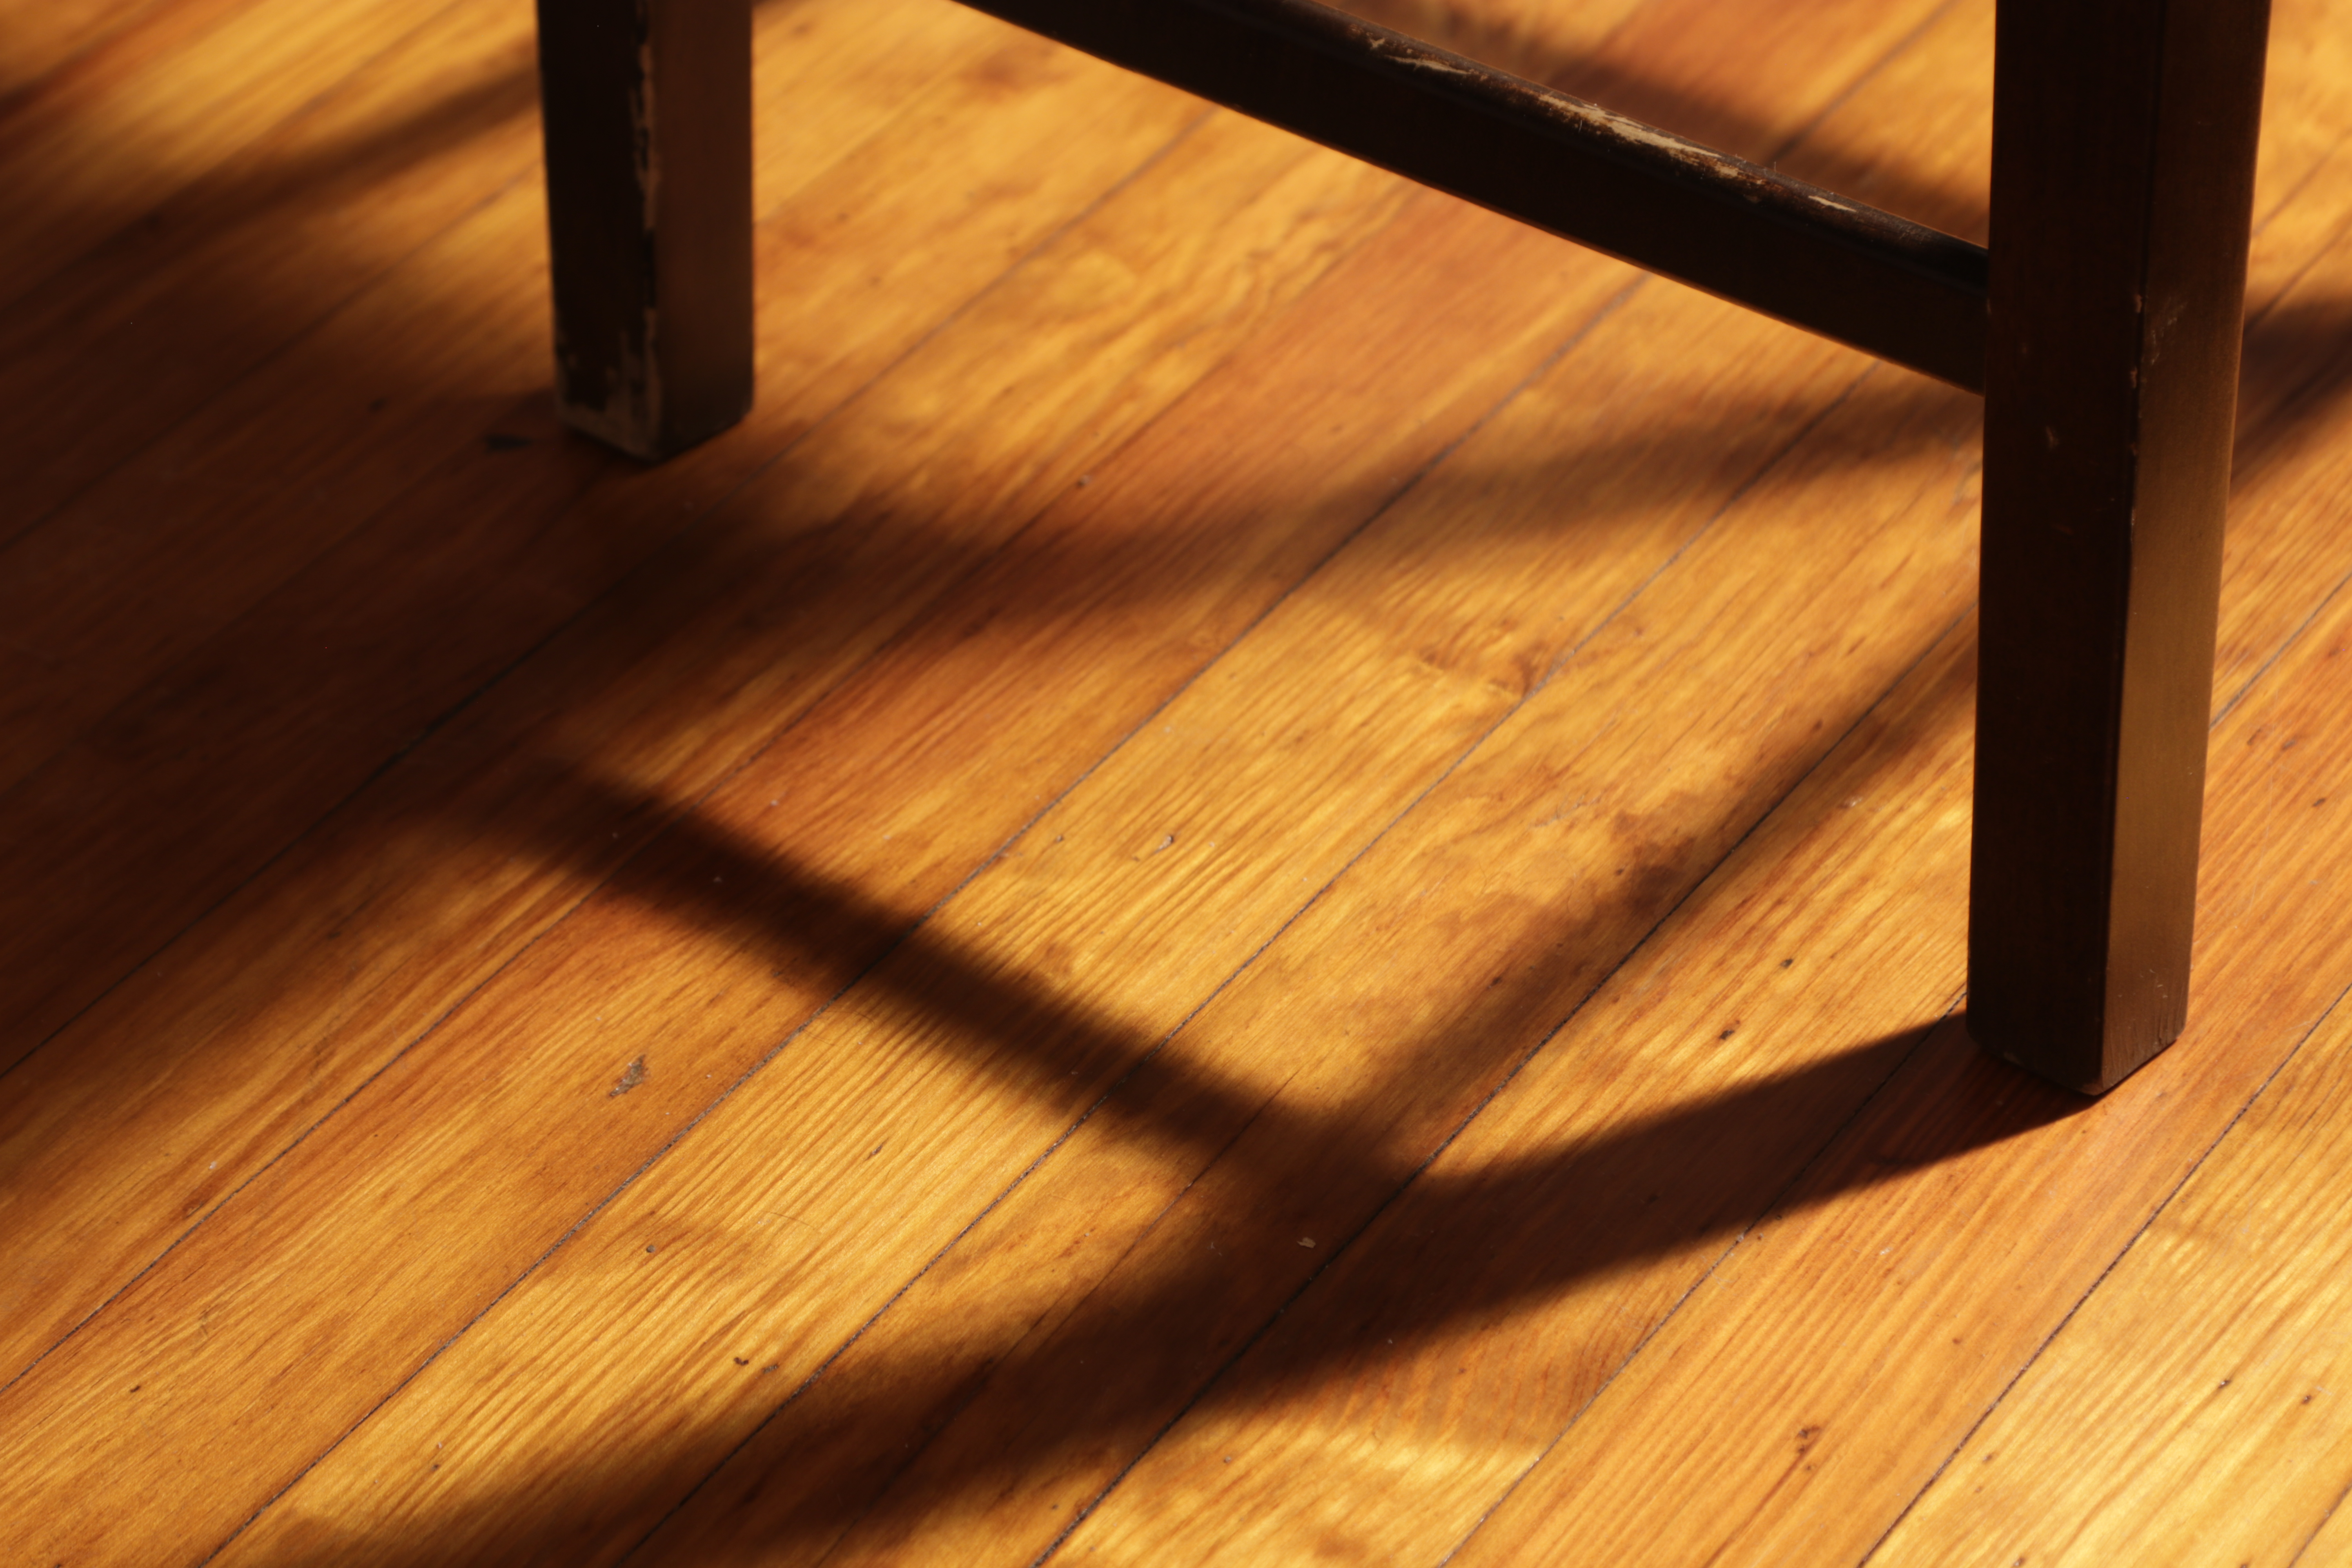
Clean
Shadow
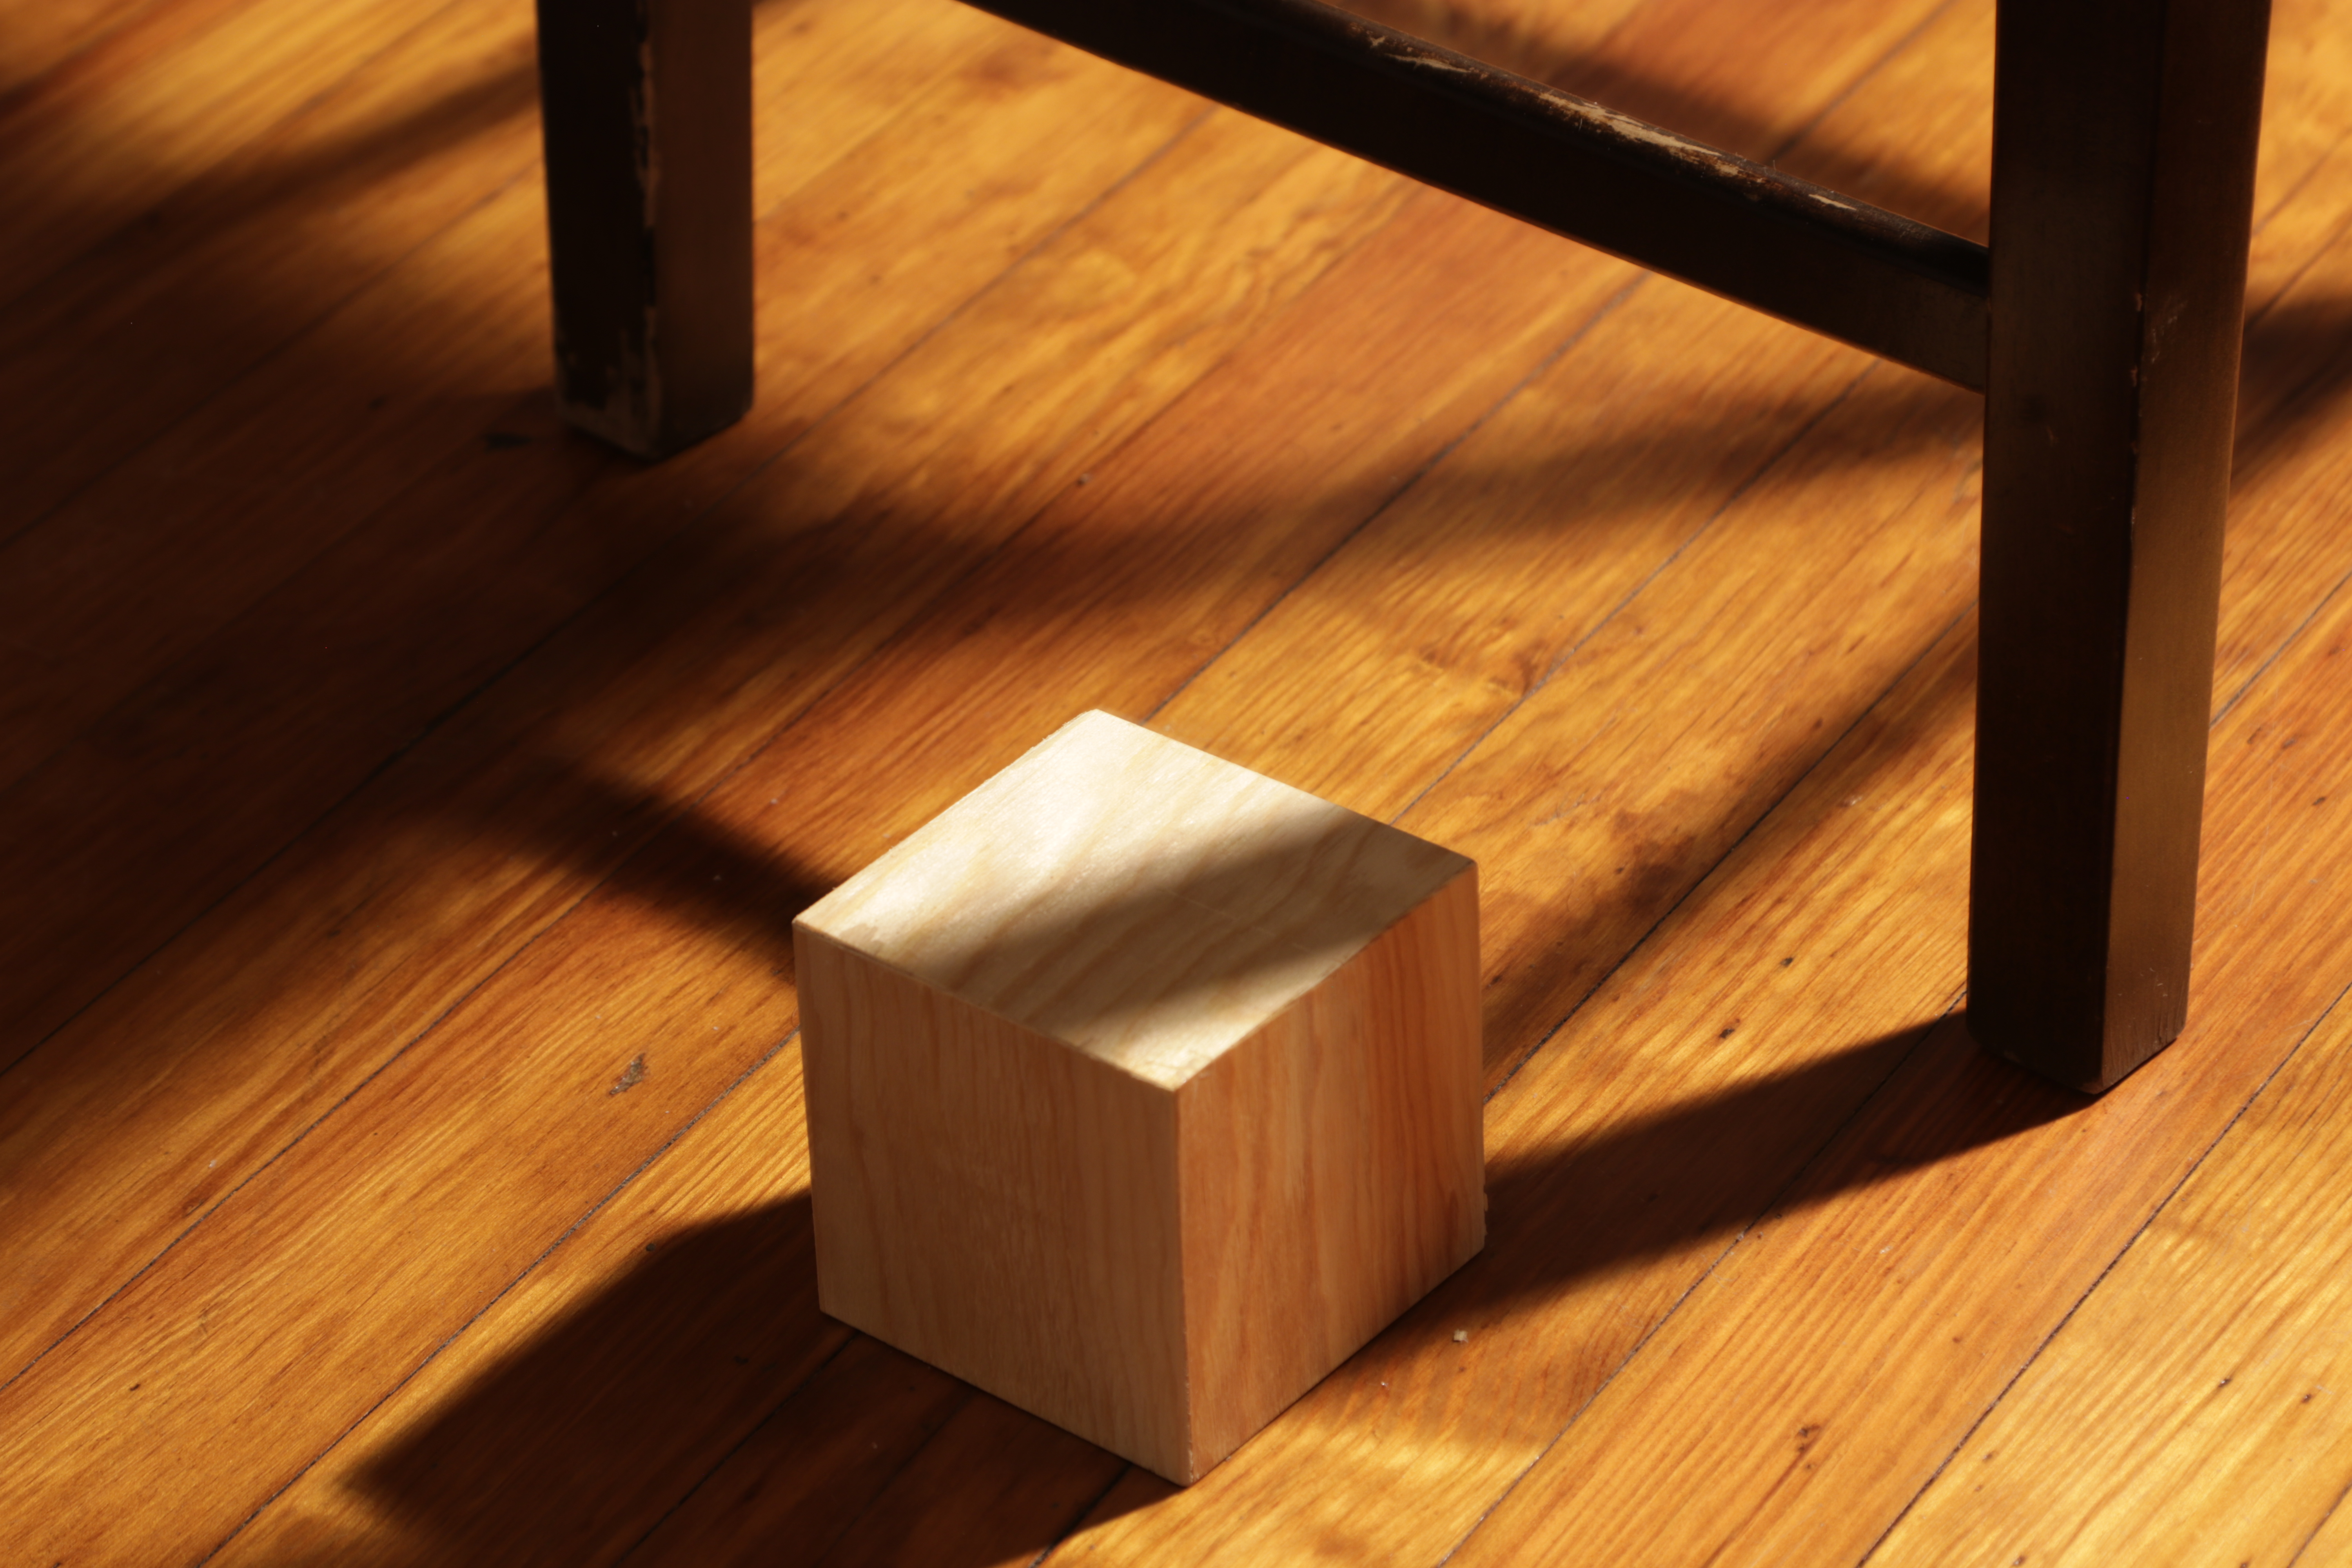
Perspective match
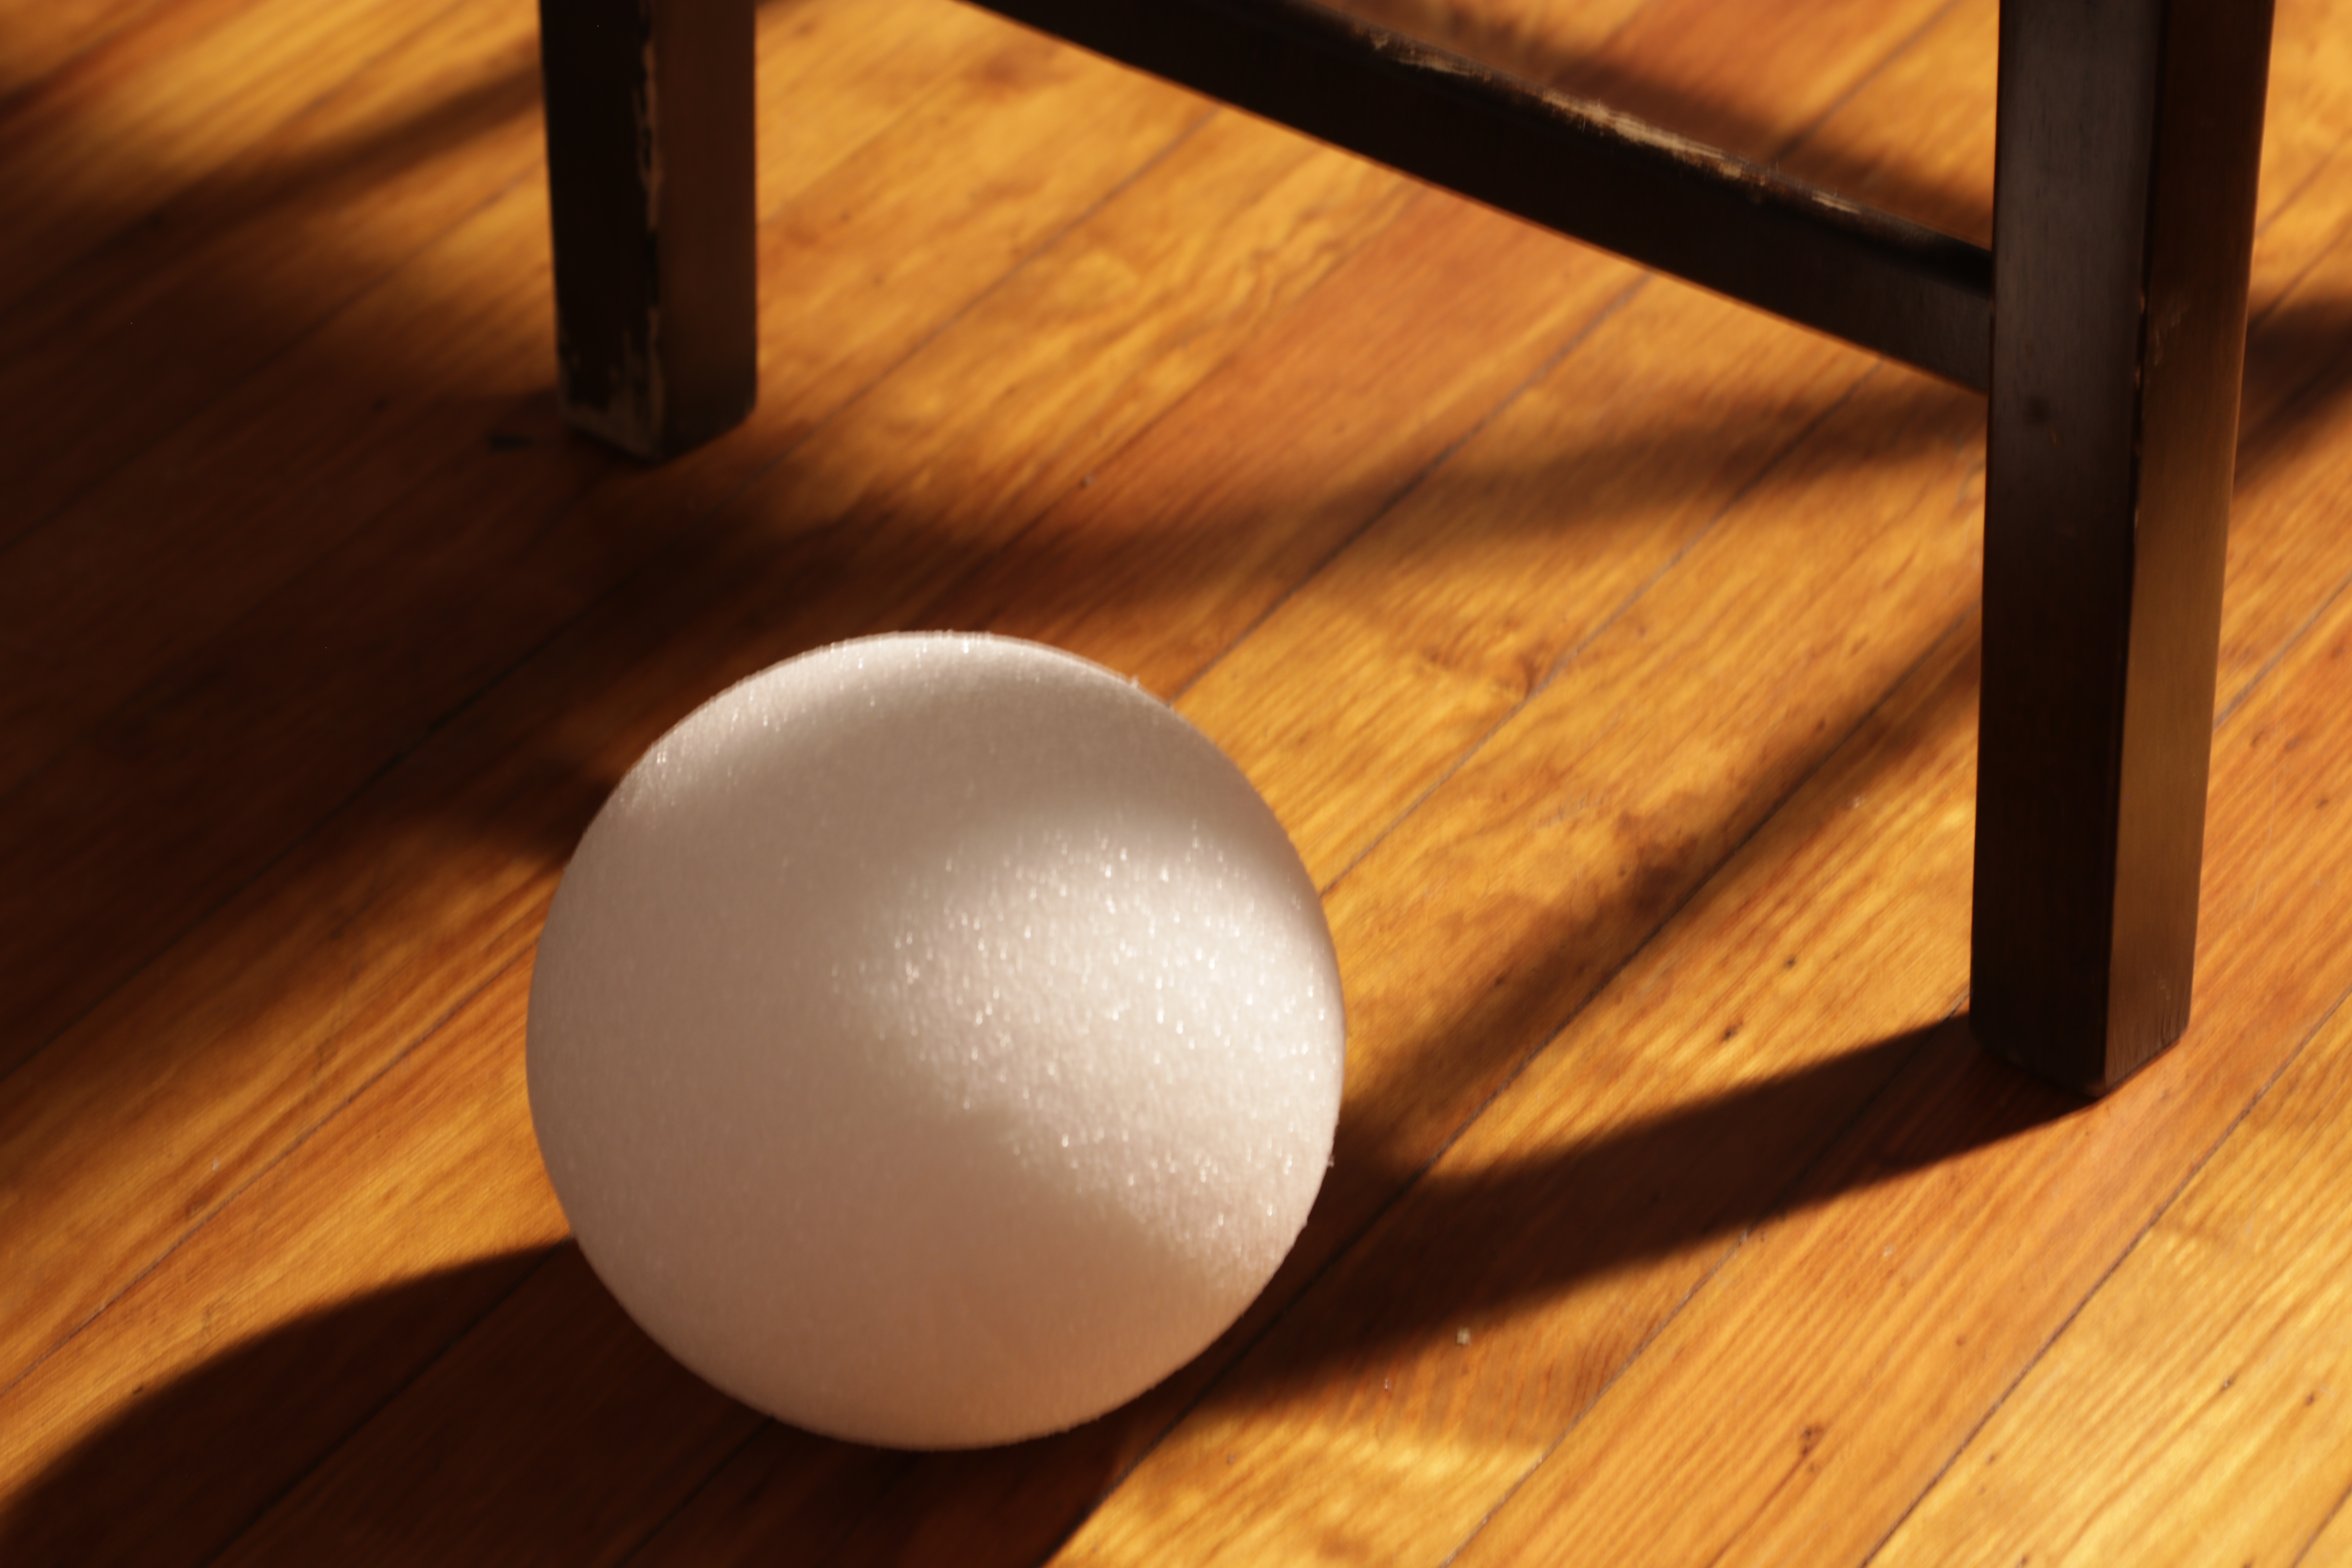
"Gray" ball
For the HDR, I tried out the Theta 360 for the first time. It worked surprisingly well despite the dark interior of the space I was in. I found setting up the bracketing a little tedious and counter-intuitive however.
I shot my plates with a Canon EOS 50D which has a crop factor of 1.6x. Using the provided calculator site, my Maya camera had a focal length of 116.8.
Matching the camera perspective turned out decent, I could never quite get it perfect but I quickly ran into worse problems once I got the fundamentals of the camera and key light down.
Notably, my issue arose with the projected environment shadows on the ball. A combination of my plate, the position of the light blockers, and where my gray ball sat in the scene contributed to a completely erroneous projected shadow.
I tested with this really quickly created "shadow" plate. This gets projected from main_cam onto the ground plane, then rendered from lightCam a camera that is parented to my key light. Here's the rendered result of that:
Project this image from light cam onto the ball (to render as environment shadows) and on the ground plane (for debugging purposes) yields us...
View from lightCam
View from main_cam
... an entirely incorrect resulting shadow placement. My best course of action at this point was to just continue setting up all my layers and render passes, build my Nuke tree, and re-shoot my plates to try and circumvent this issue.
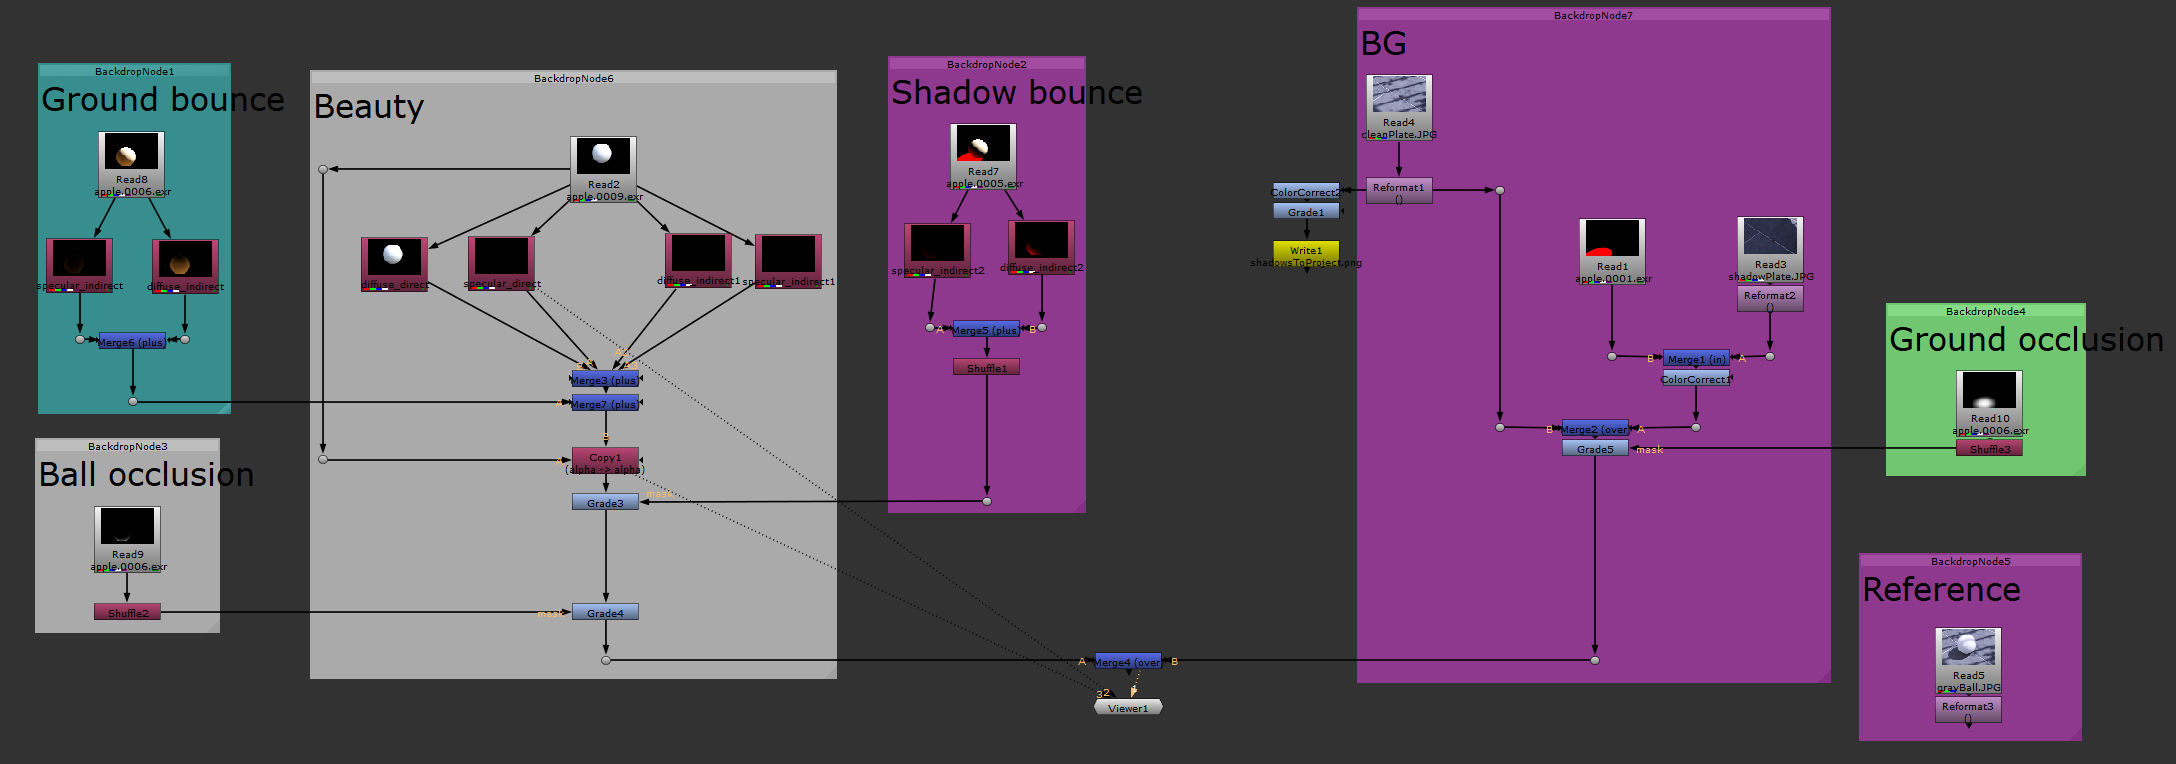
Current light comp
Week 2
I've reshot my plates based on the hurdles I faced with the last set and tried to find a scene that would work better. This time the plates are outdoors, and I currently am seeing a few discrepancies from plate to plate because of the sun moving slightly. I think overall it should work though.
Quickly plugging in the new plates and checking the shadowPrep render layer, I noticed that it is already working much better, as expected.
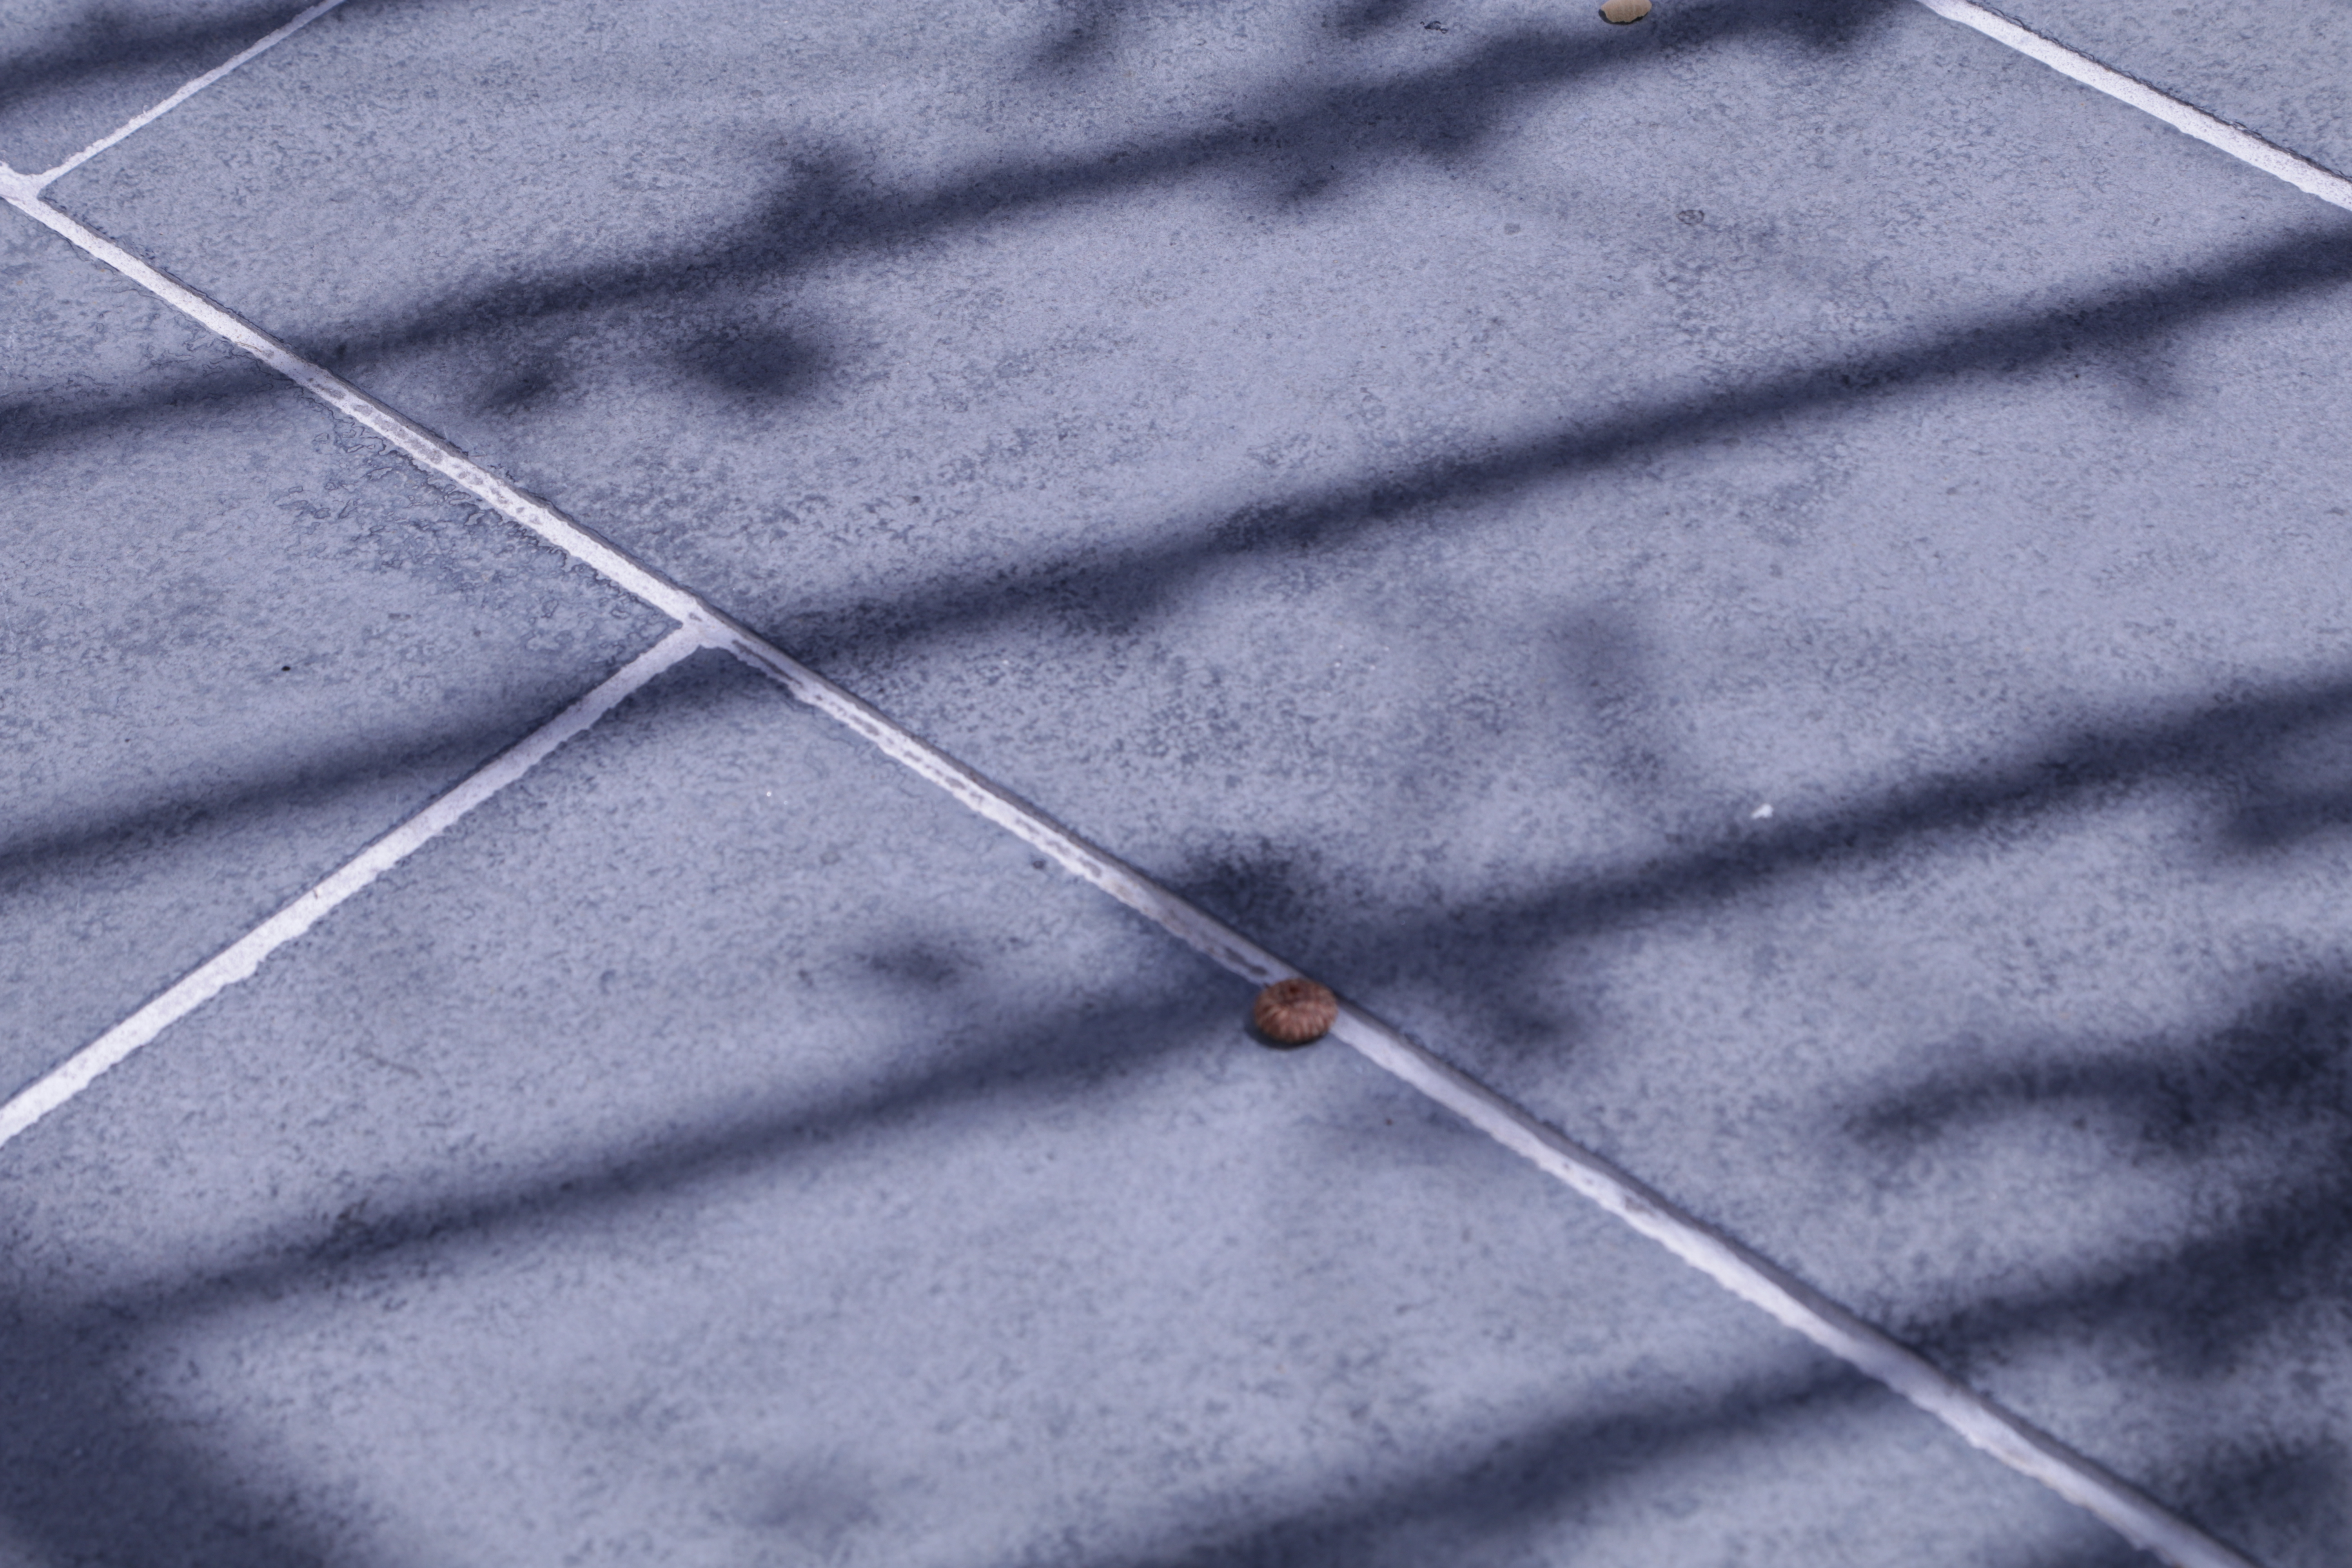
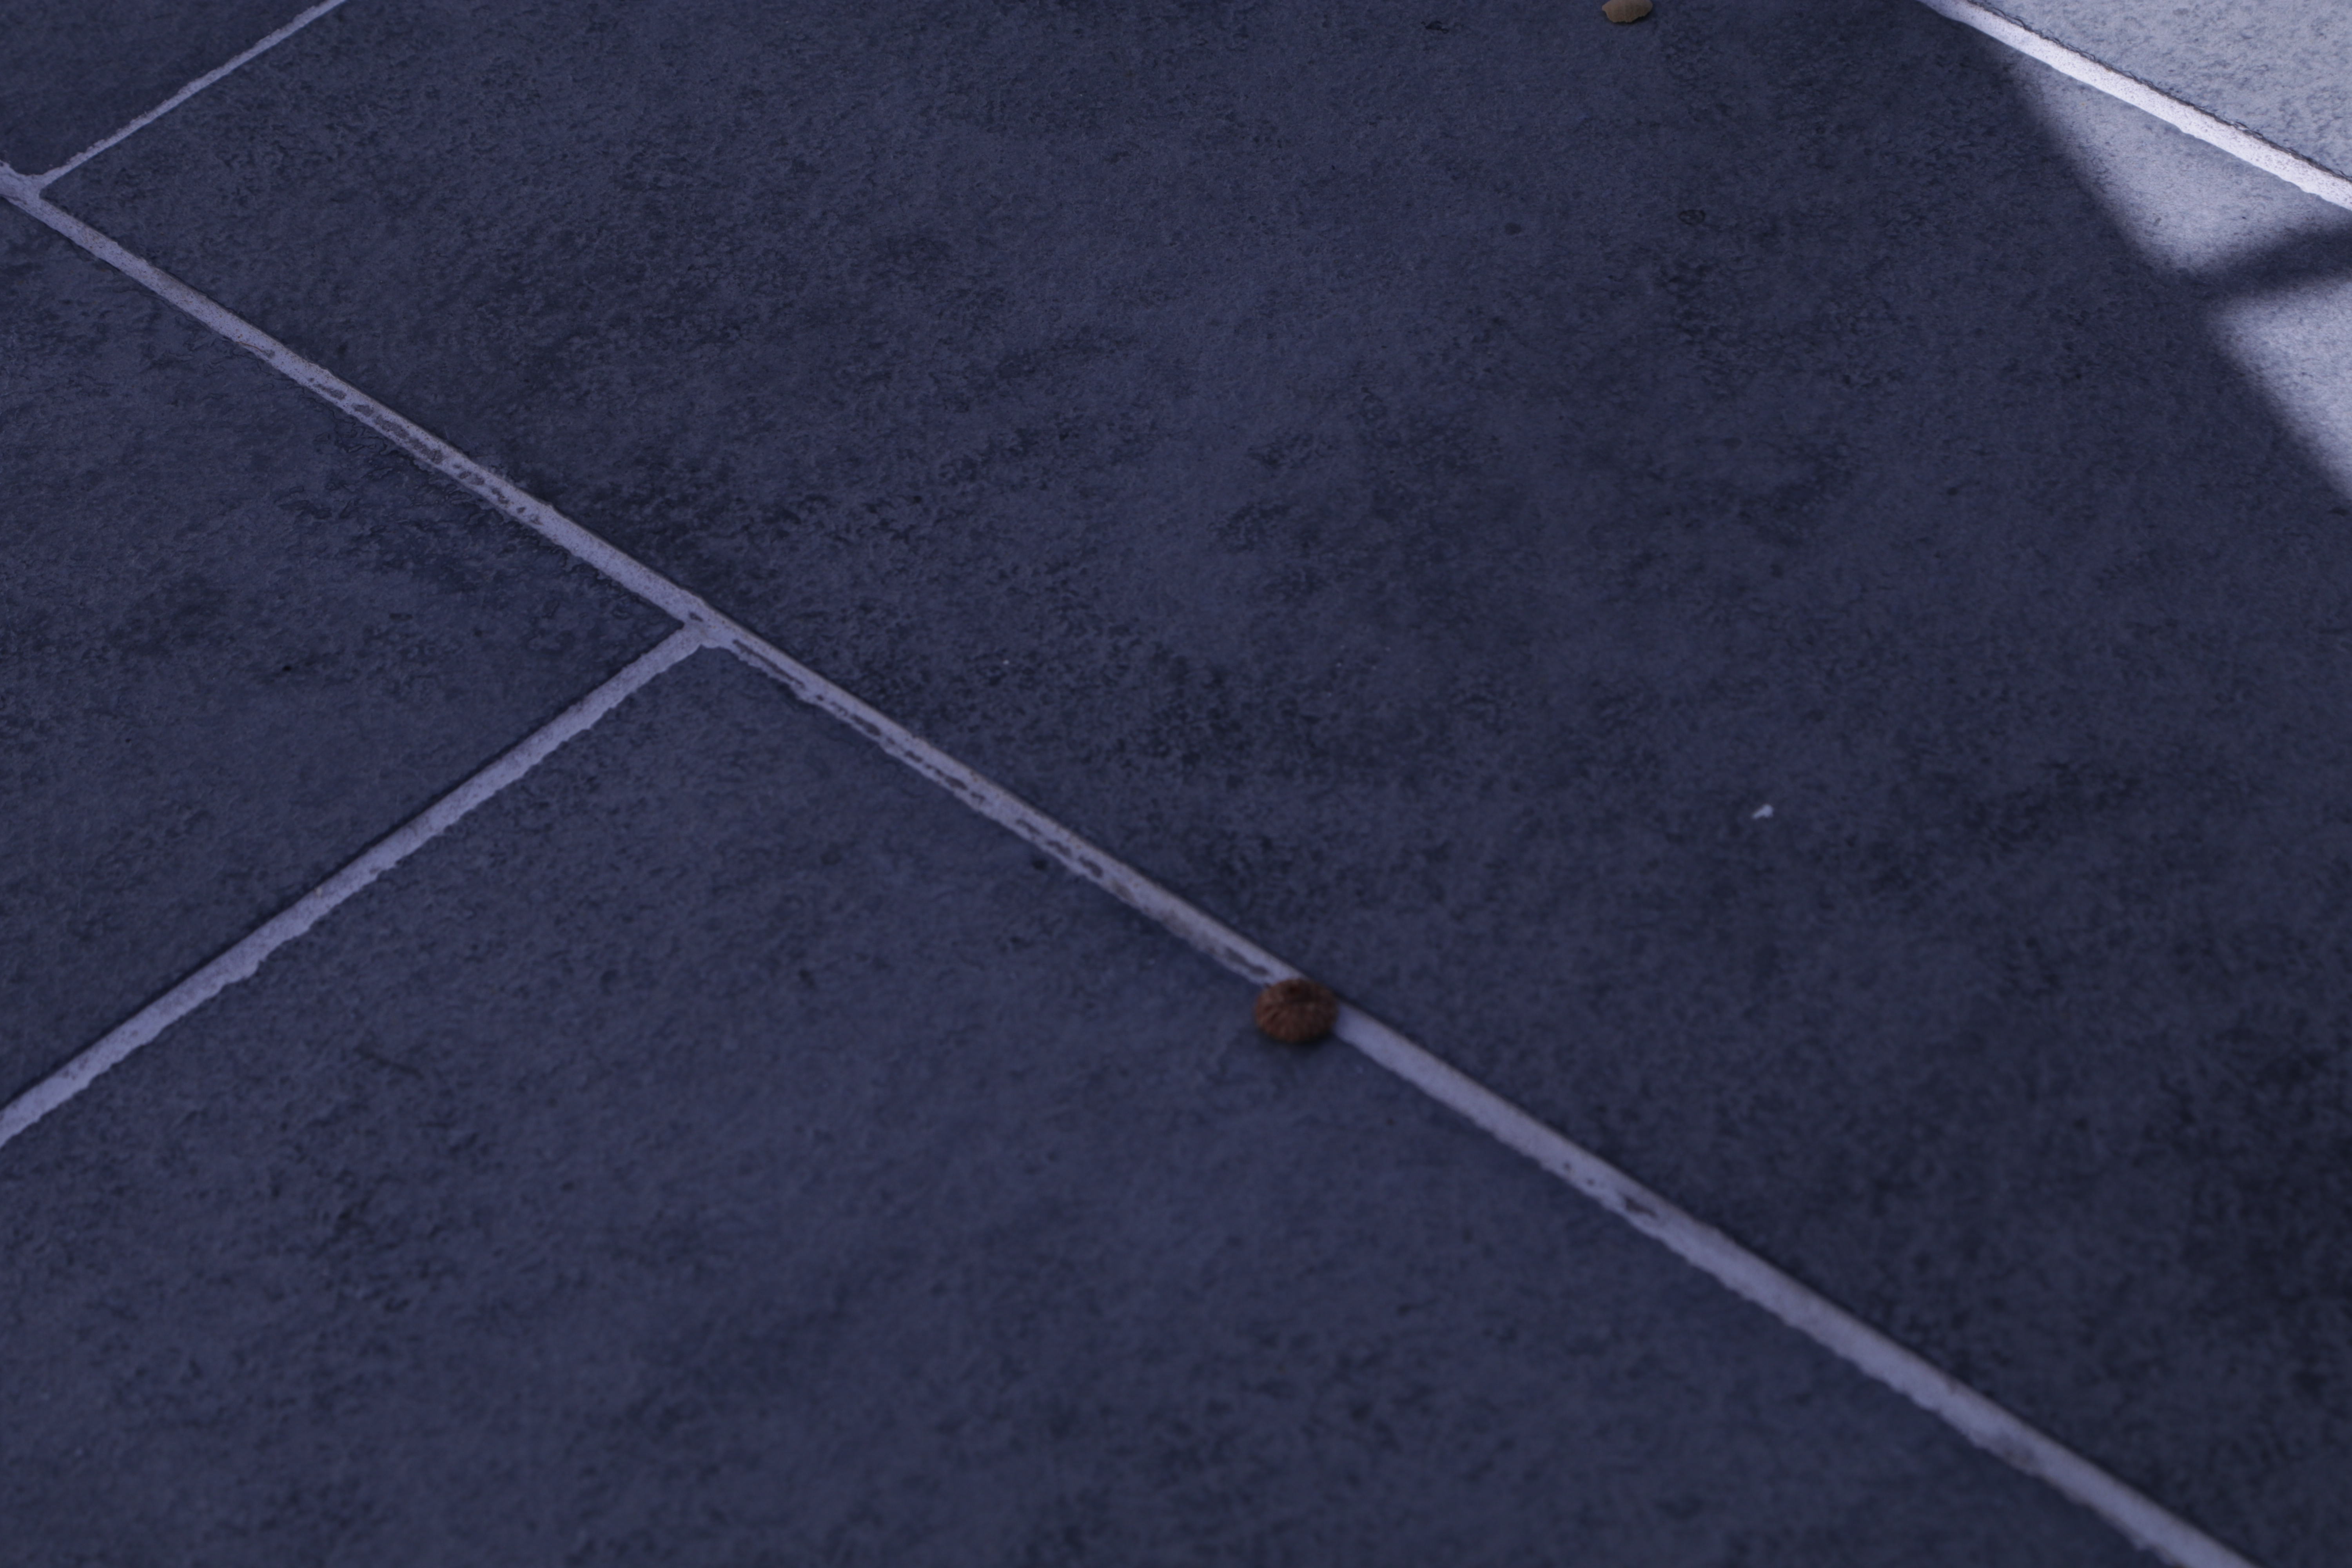
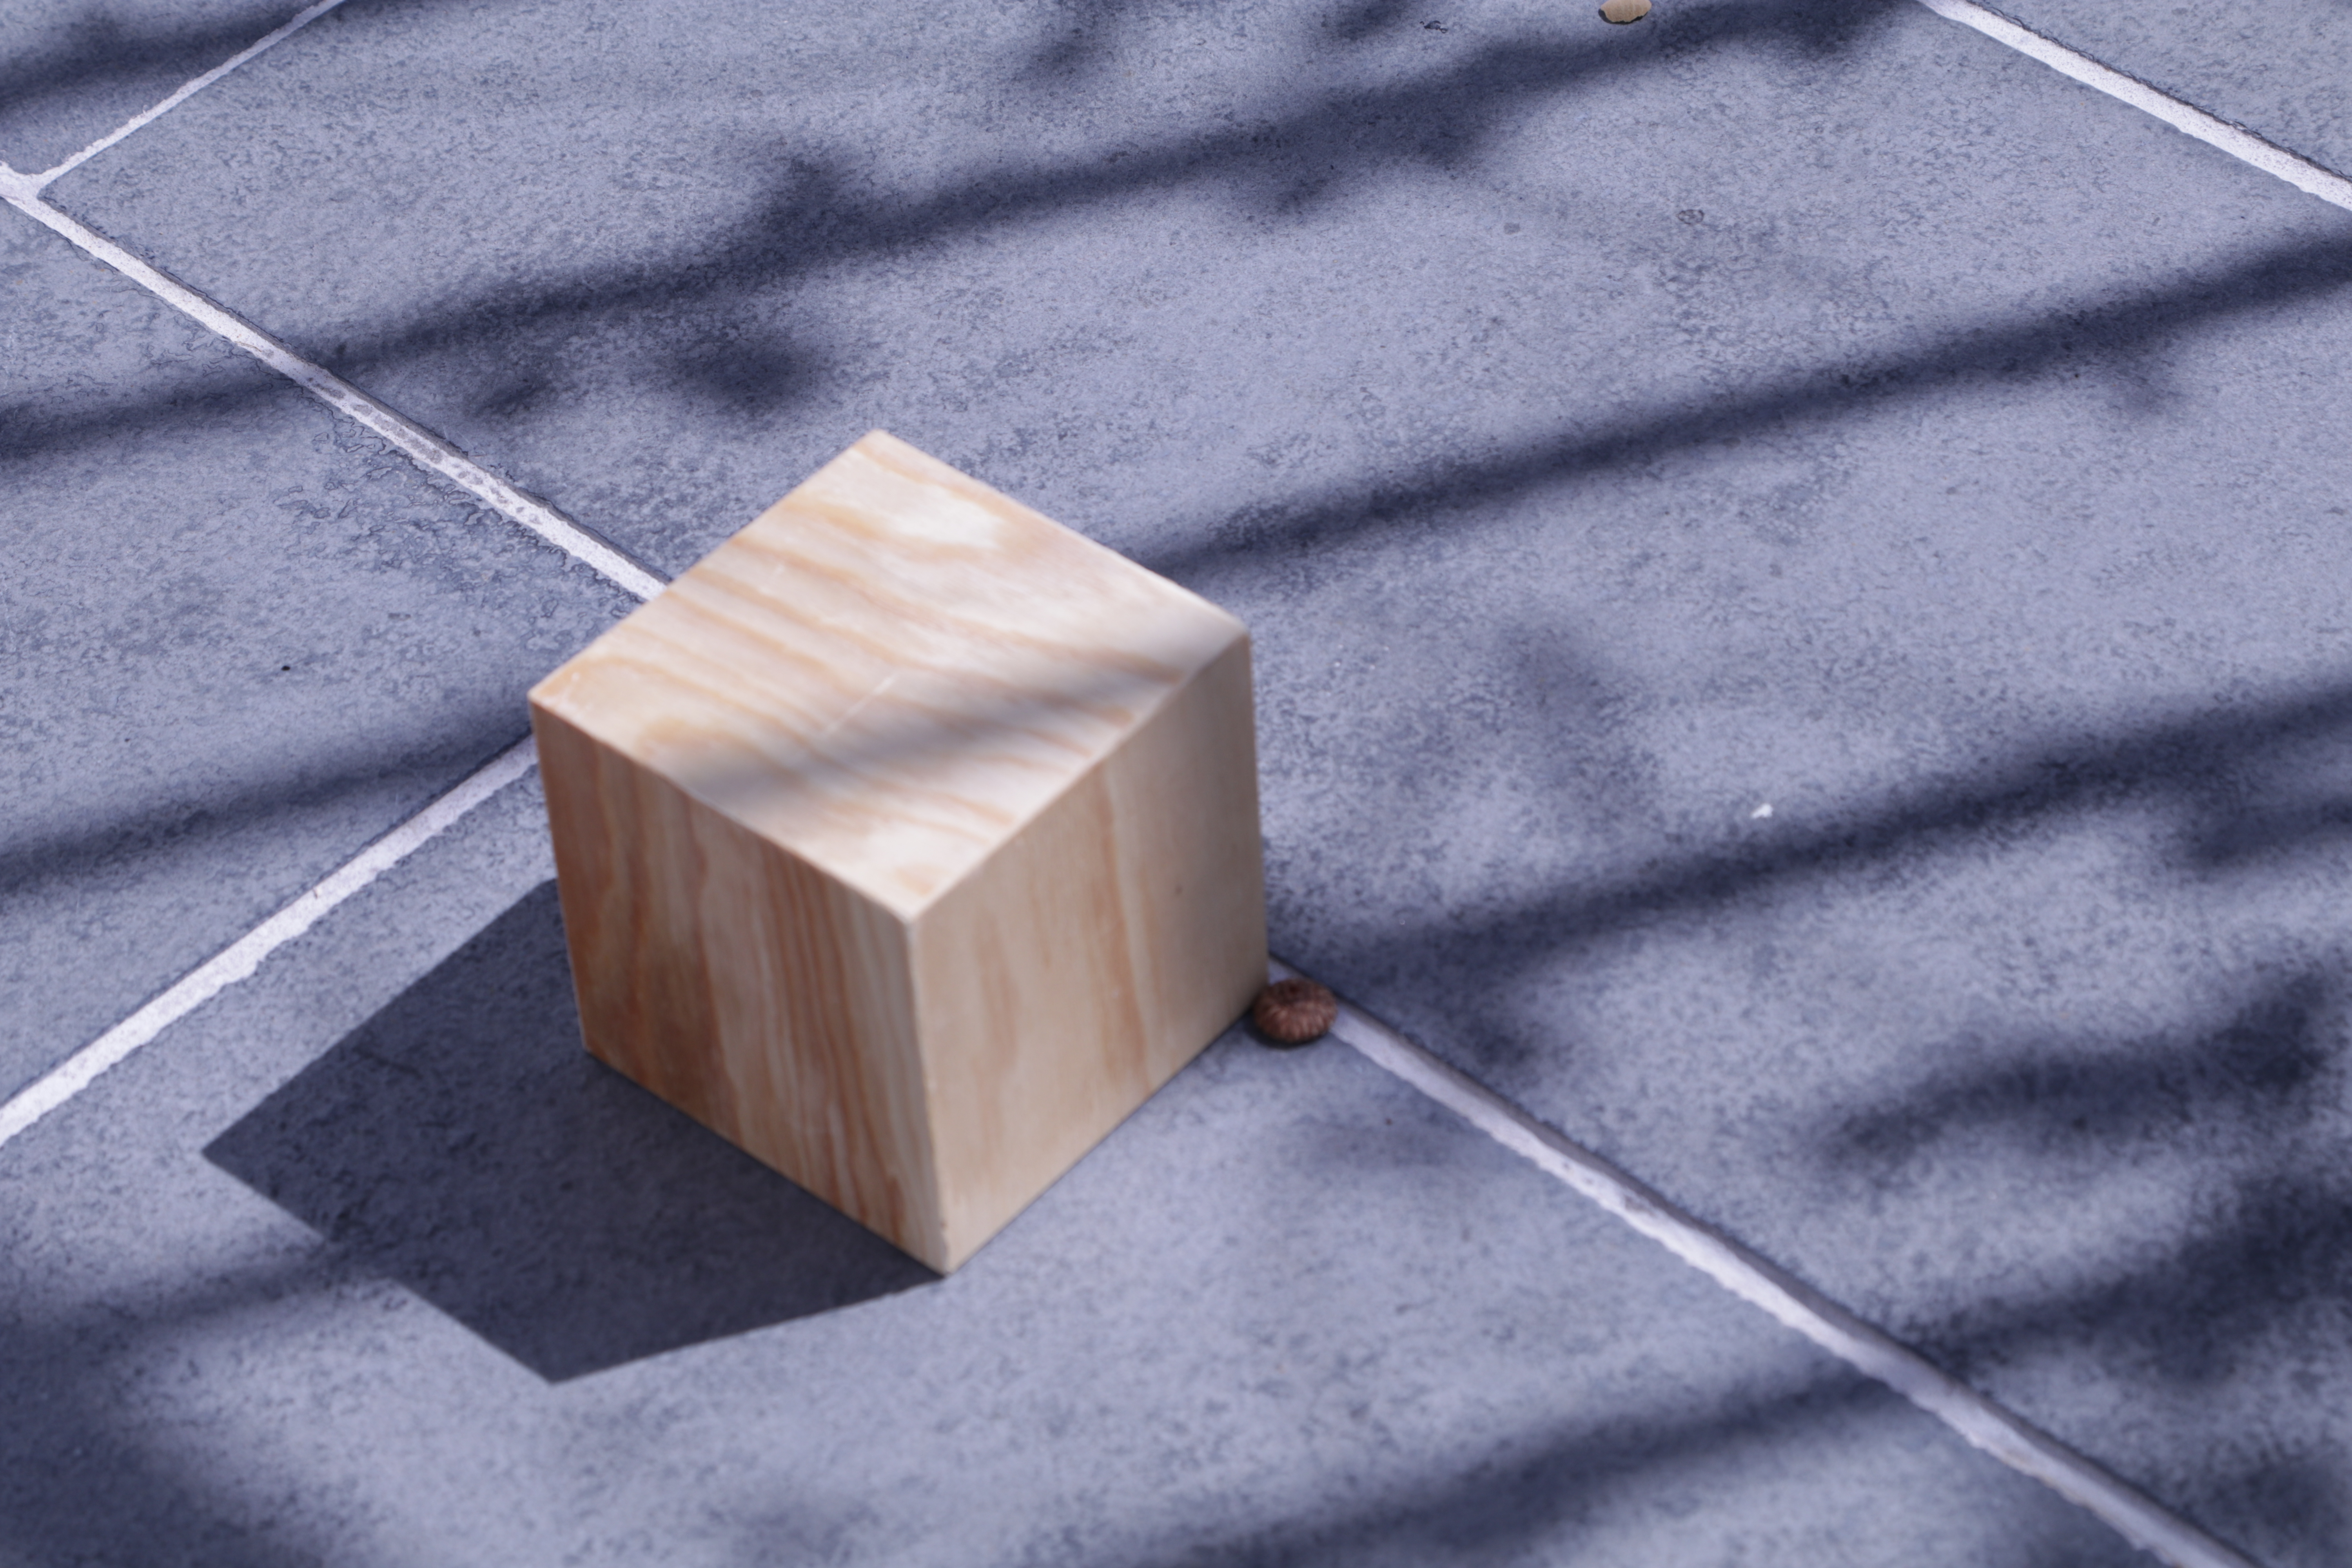
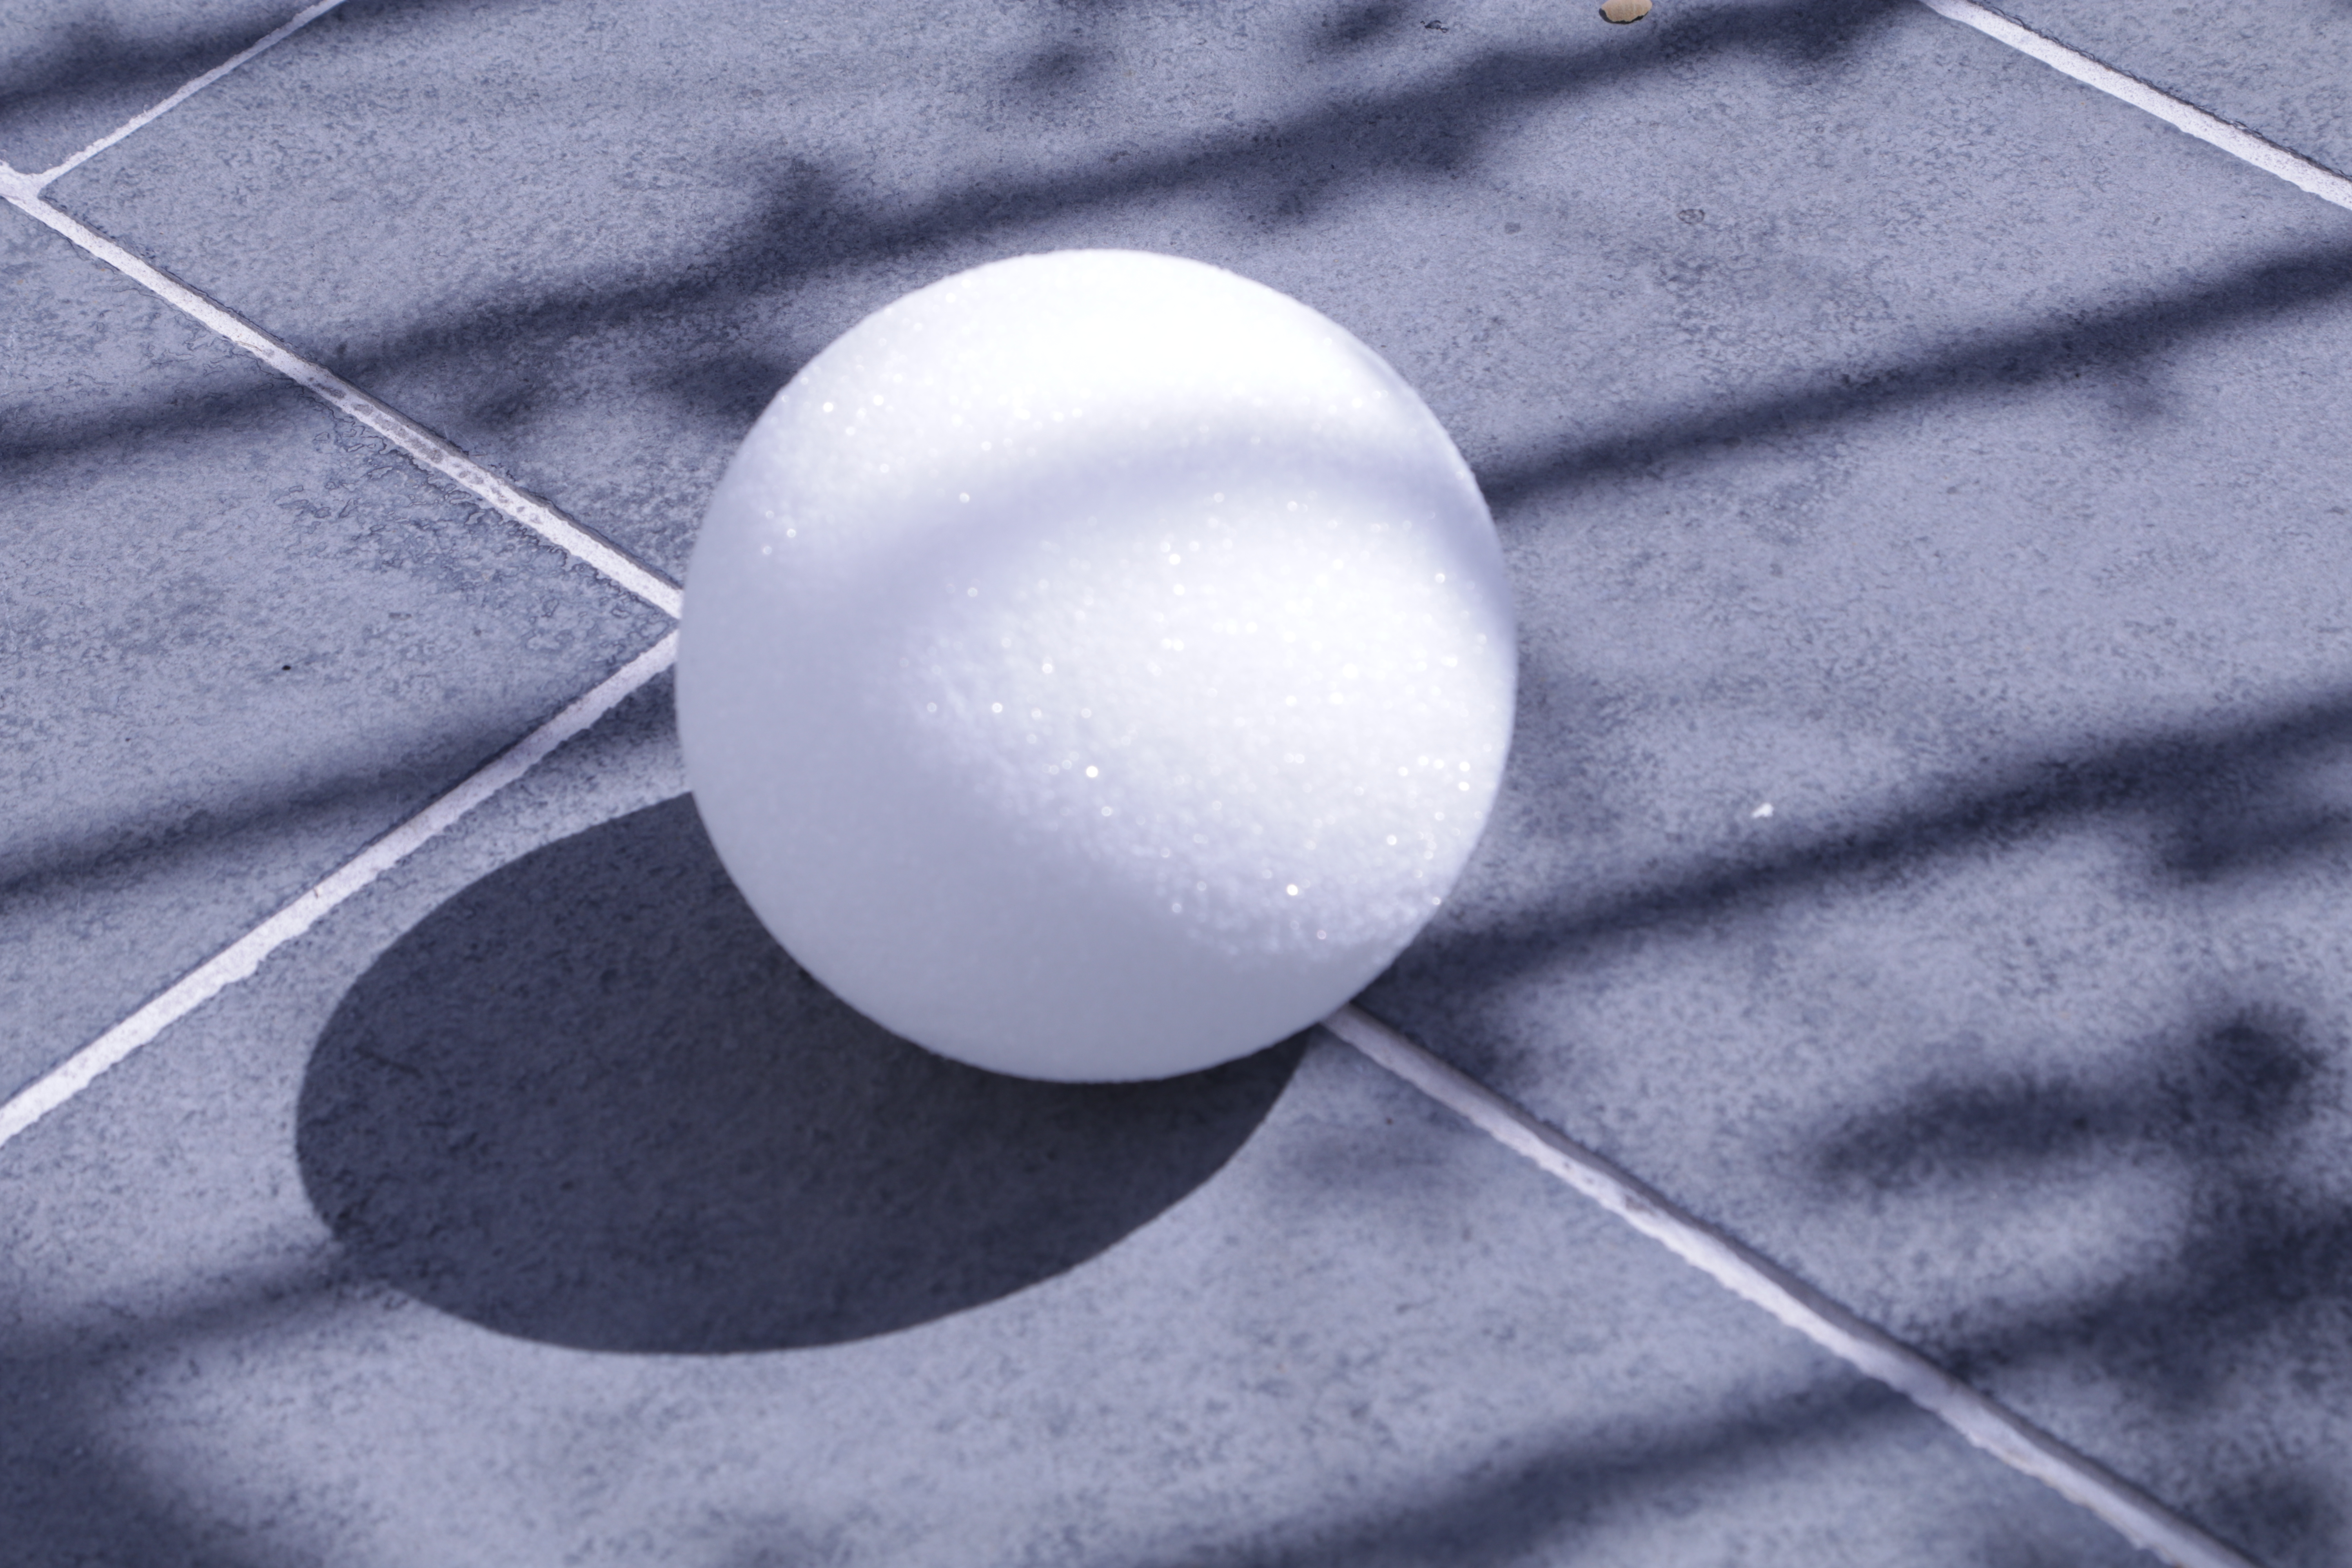
The only thing that didn't work out was that I couldn't get the Theta 360 to take any underexposed photos with this bright scene, even with the lowest ISO and quickest shutter speed. Hopefully the HDR still works fine.
Rough "shadow" projection
Now I need to work on getting all my renders out and start shading the apple, which is the actual object I will be rolling through the scene. I'm facing some issues with my AOVs being incorrect (like having no data in my indirect AOVs or no spec AOVs) - so I will also be troubleshooting that.
The other issue I faced was my compositing method for the projected shadows. I was having a double shadow on the ball itself as the projected shadow "ran into" the key light's shadow on the near side of the ball.
Example wipe showing the projected shadow conflicting with the key shadow
This was how I was doing the comp:
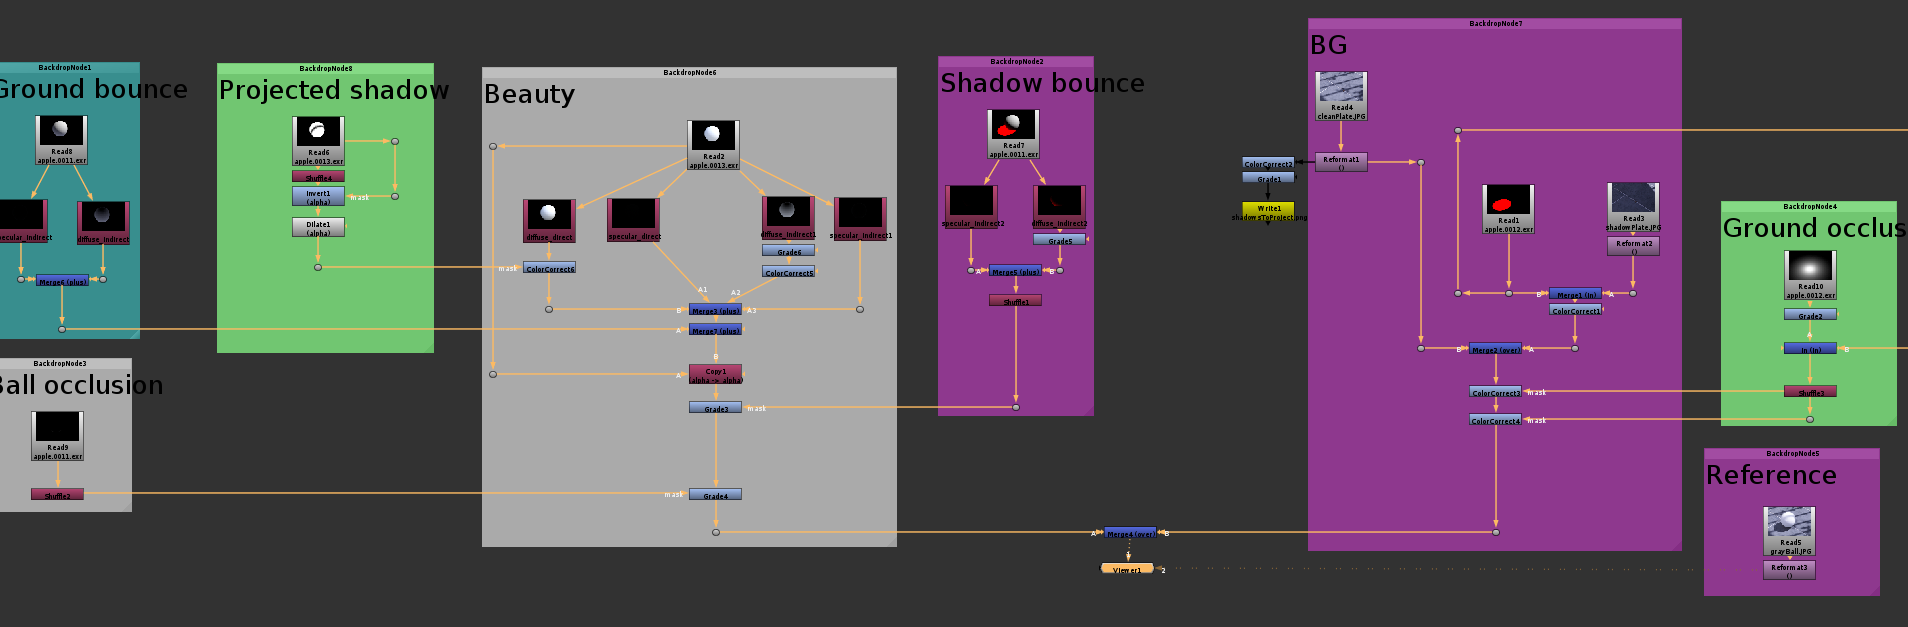
I figured out this was due to me grading both the Key and Fill light "beauty" pass at the same time. I forgot I need to split out the lights and grade only the key light pass with the projected shadows. I split my old beauty pass into 2 and re-arranged my comp (see the final comp at the end below).
Week 2.5
My AOVs ended up being completely fine, I just wasn't interpreting them correctly. I decided to do the apple textures completely procedurally because it's easier for me to control versus painting them in Substance or Mari... also I find it more fun.
I played a lot with AiMix shaders to layer the different coloration differences and spots you might see on a red apple. Here's my reference:
And this is what my hypershade network ended up looking like:
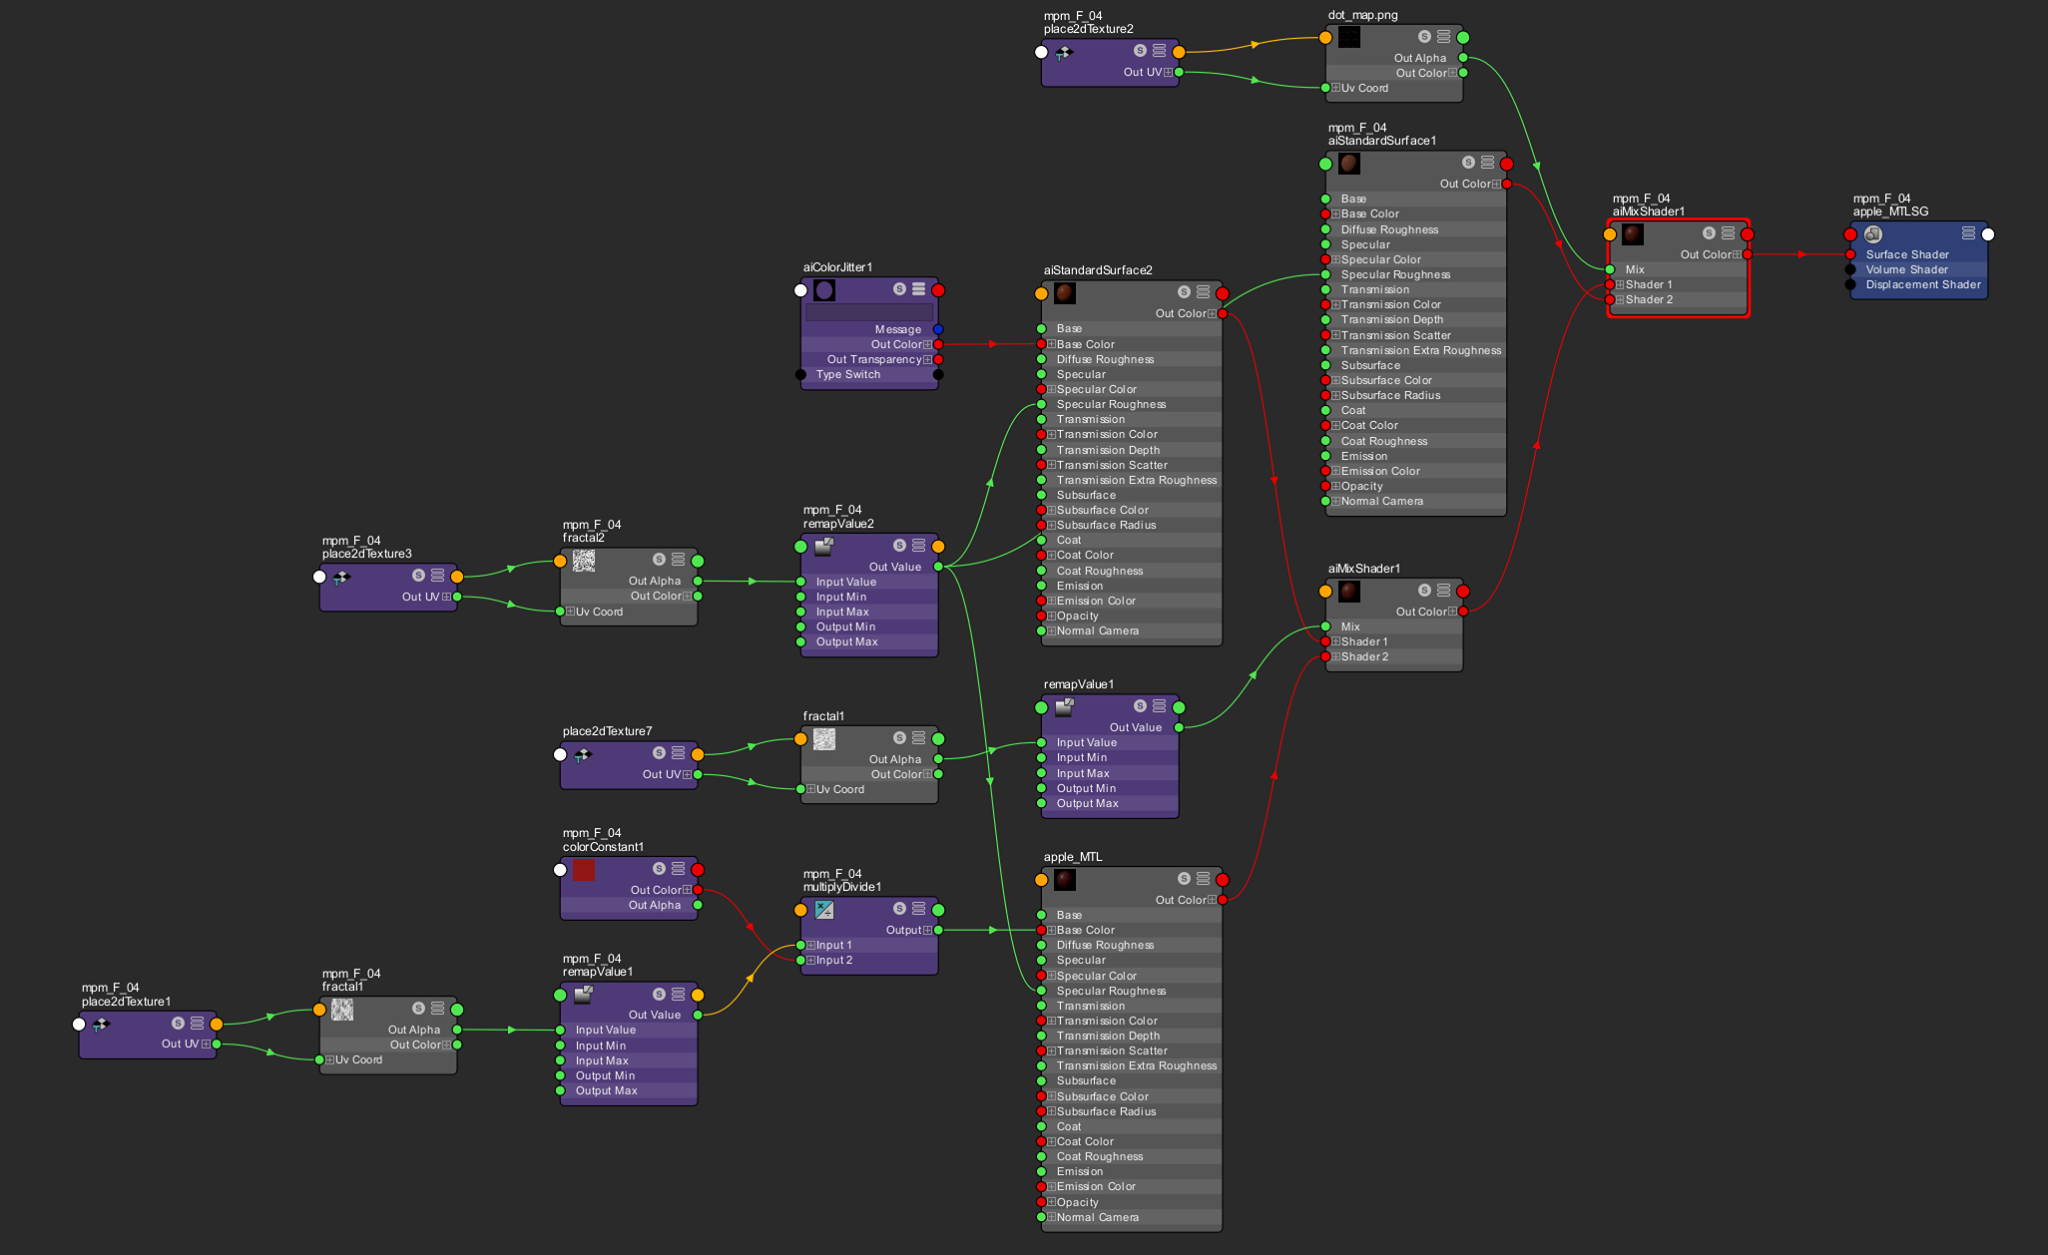
Main core of the shader:
Here's what that looks like just simply in the Arnold render view:
Based on the professor's advice to another student, I went back and re-painted my rendered projected shadows so that their re-projection onto the ball would be more accurate to the scene.
It helped tremendously. It looks really strange, but the way the light camera distorts the repeated texture ends up working really well to match the original plate's shadows.
Old
New
My comp ended up being pretty straight forward. I was able to use a lot of my passes like ground reflections, and the 2 different occlusions to really nail down the different colors in the shadows. Once I had matched the gray ball, there was little to no tweaking I needed to do when I swapped my apple back in.
Here's my final tree:
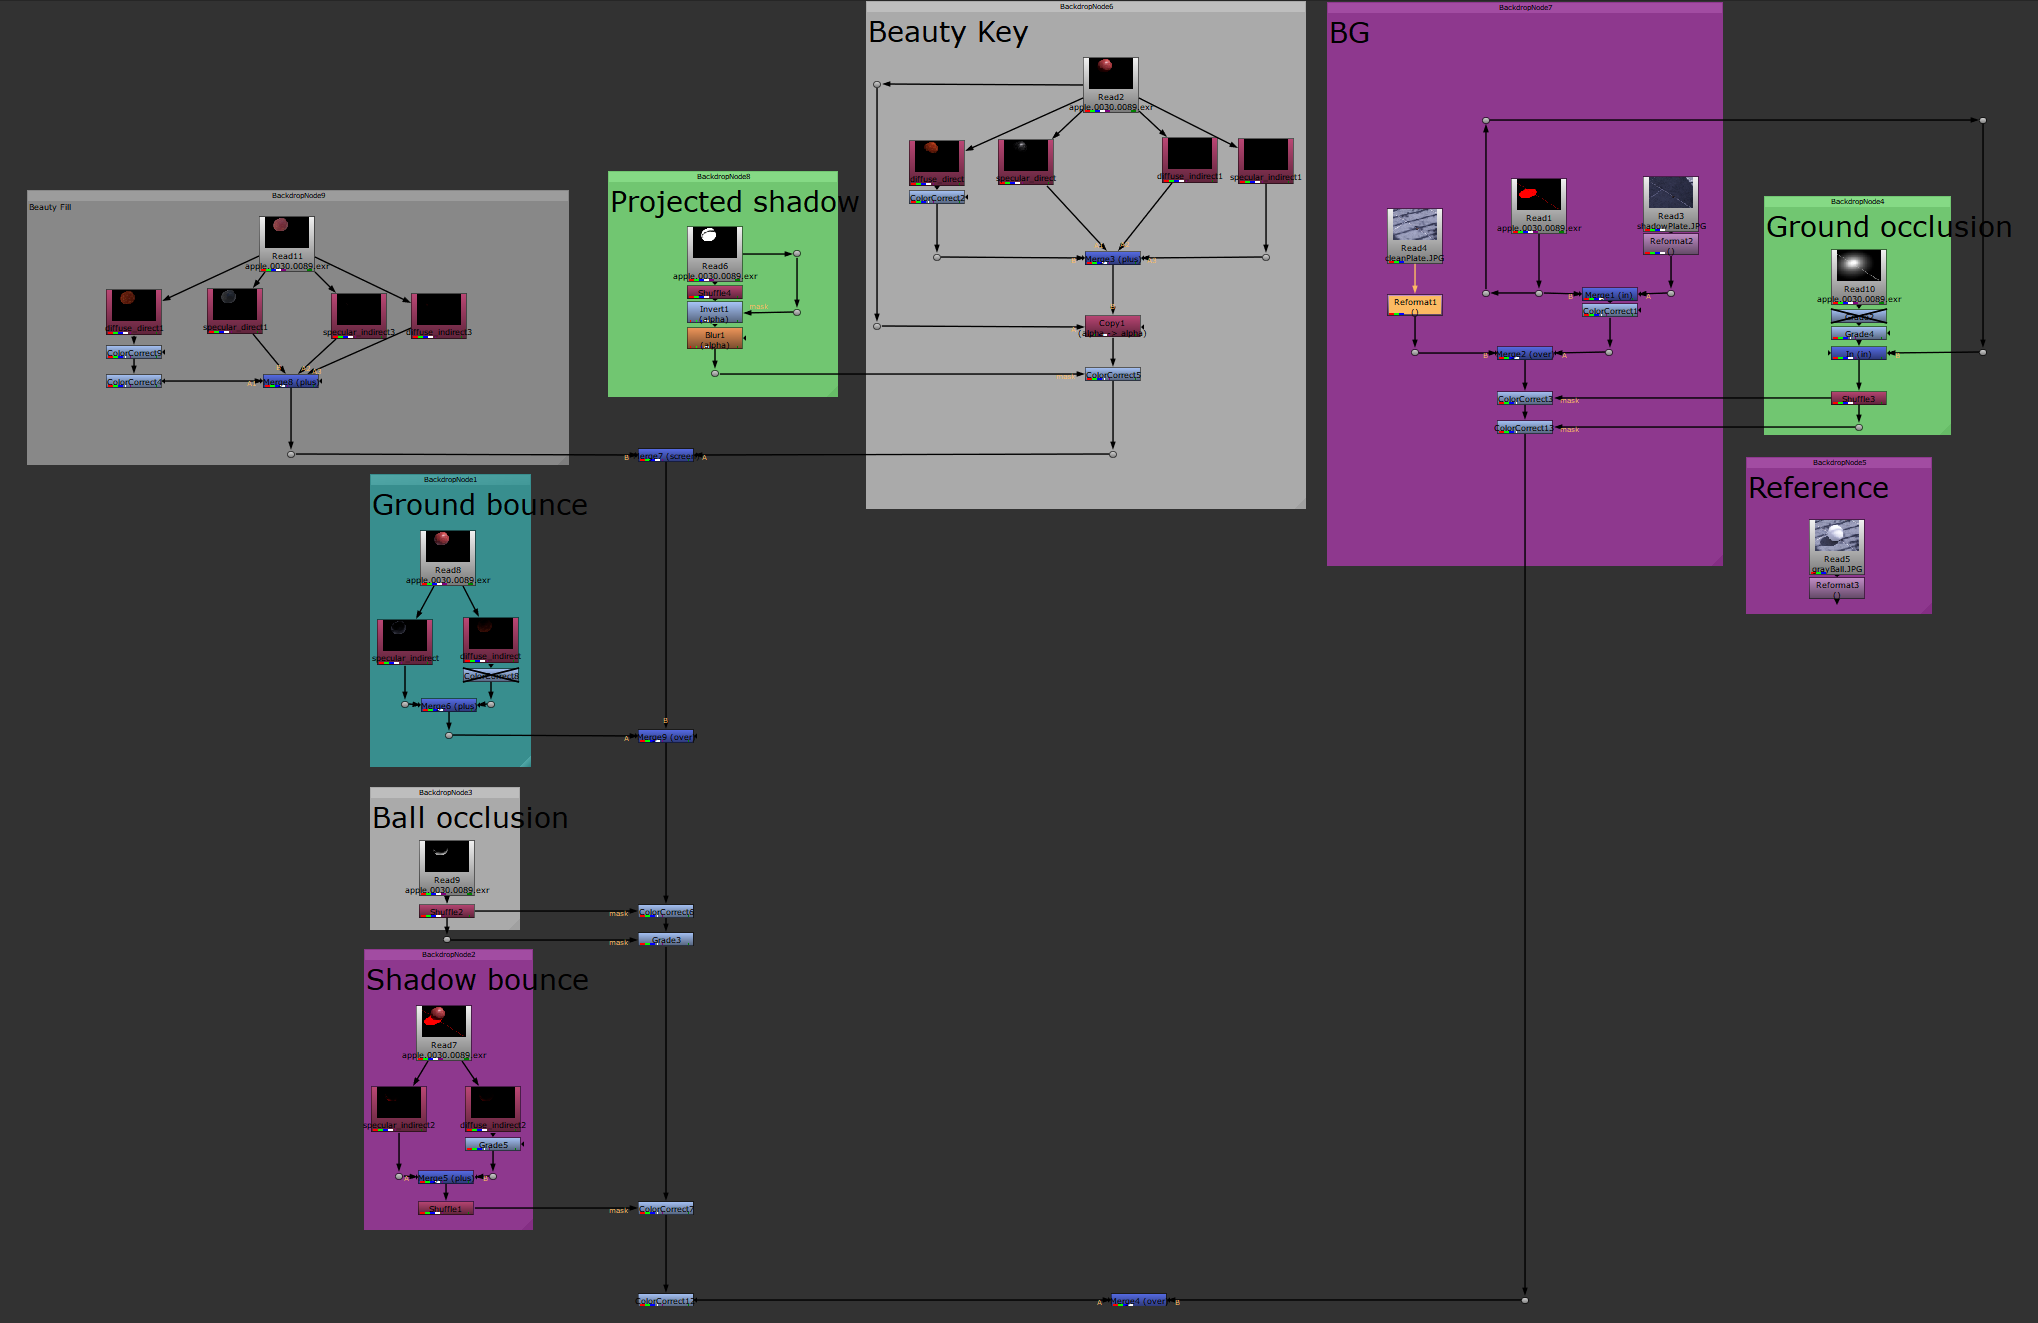
... And here's a still:
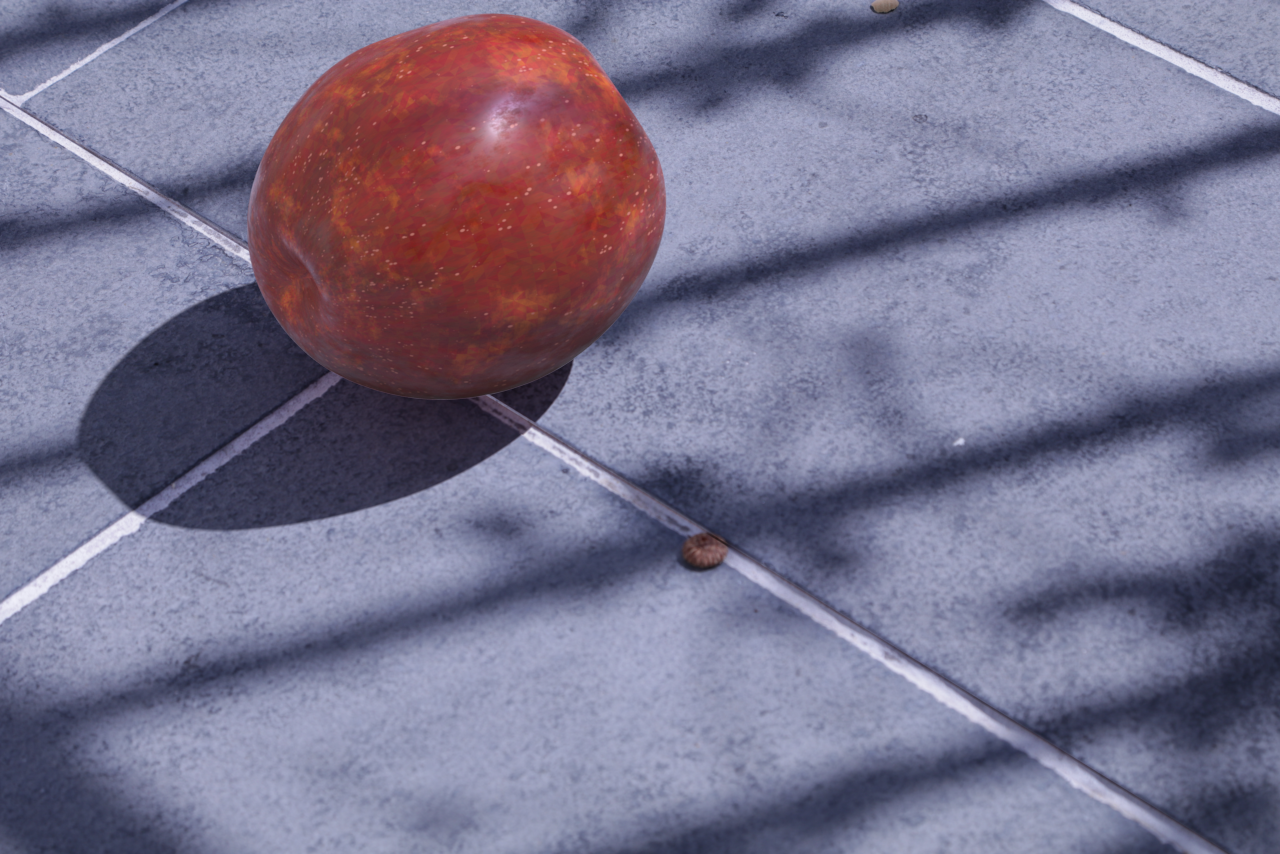
Conclusion
I think I would like to spend some time figuring out a motion vector pass, it would have helped the integration a lot.
There were definitely some hurdles to getting the shadow projection looking right, and it's definitely not a fullproof method since it's so dependant on the camera focal length you are projecting it back from.
Because you can finesse the map through trial-and-error, I'm thinking it'd be possible to automate and/or calculate what map would be needed to project from the light cam position in order to obtain the correct map that looks like the original background plate's shadows (when viewed from the render cam).
If I had another week or so, I'd also properly UV my apple and continue tweaking the shader some more.
Project 2
Week 1
I initially captured my plates over the weekend then started modeling proxy geo since the surfaces surrounding my scene were reflective. I mocked up the camera and keylight position using the cube and gray ball plates respectively.
Unfortunately, a quick slap comp showed me that since the exposures of my gray ball and my clean plate were different, I was going to have a hard time matching the key light exposure. I opted to re-shoot my photos after the first week, in order to save myself some time overall.
Week 2
Because I had already setup my scene previously, re-shooting my plates wasn't too big a deal. All I had to do was modify my camera and keylight position slightly. A very useful trick I figured out for placing the keylight was as follows:
- Place down keylight
- Place down a locator
- Parent keylight to the locator while maintaining offsets
- Move the locator while looking through the camera, rather than moving the keylight while looking through it
I found much more success in quickly placing my keylight to match the gray ball shadow using this method.
Here are my plates:
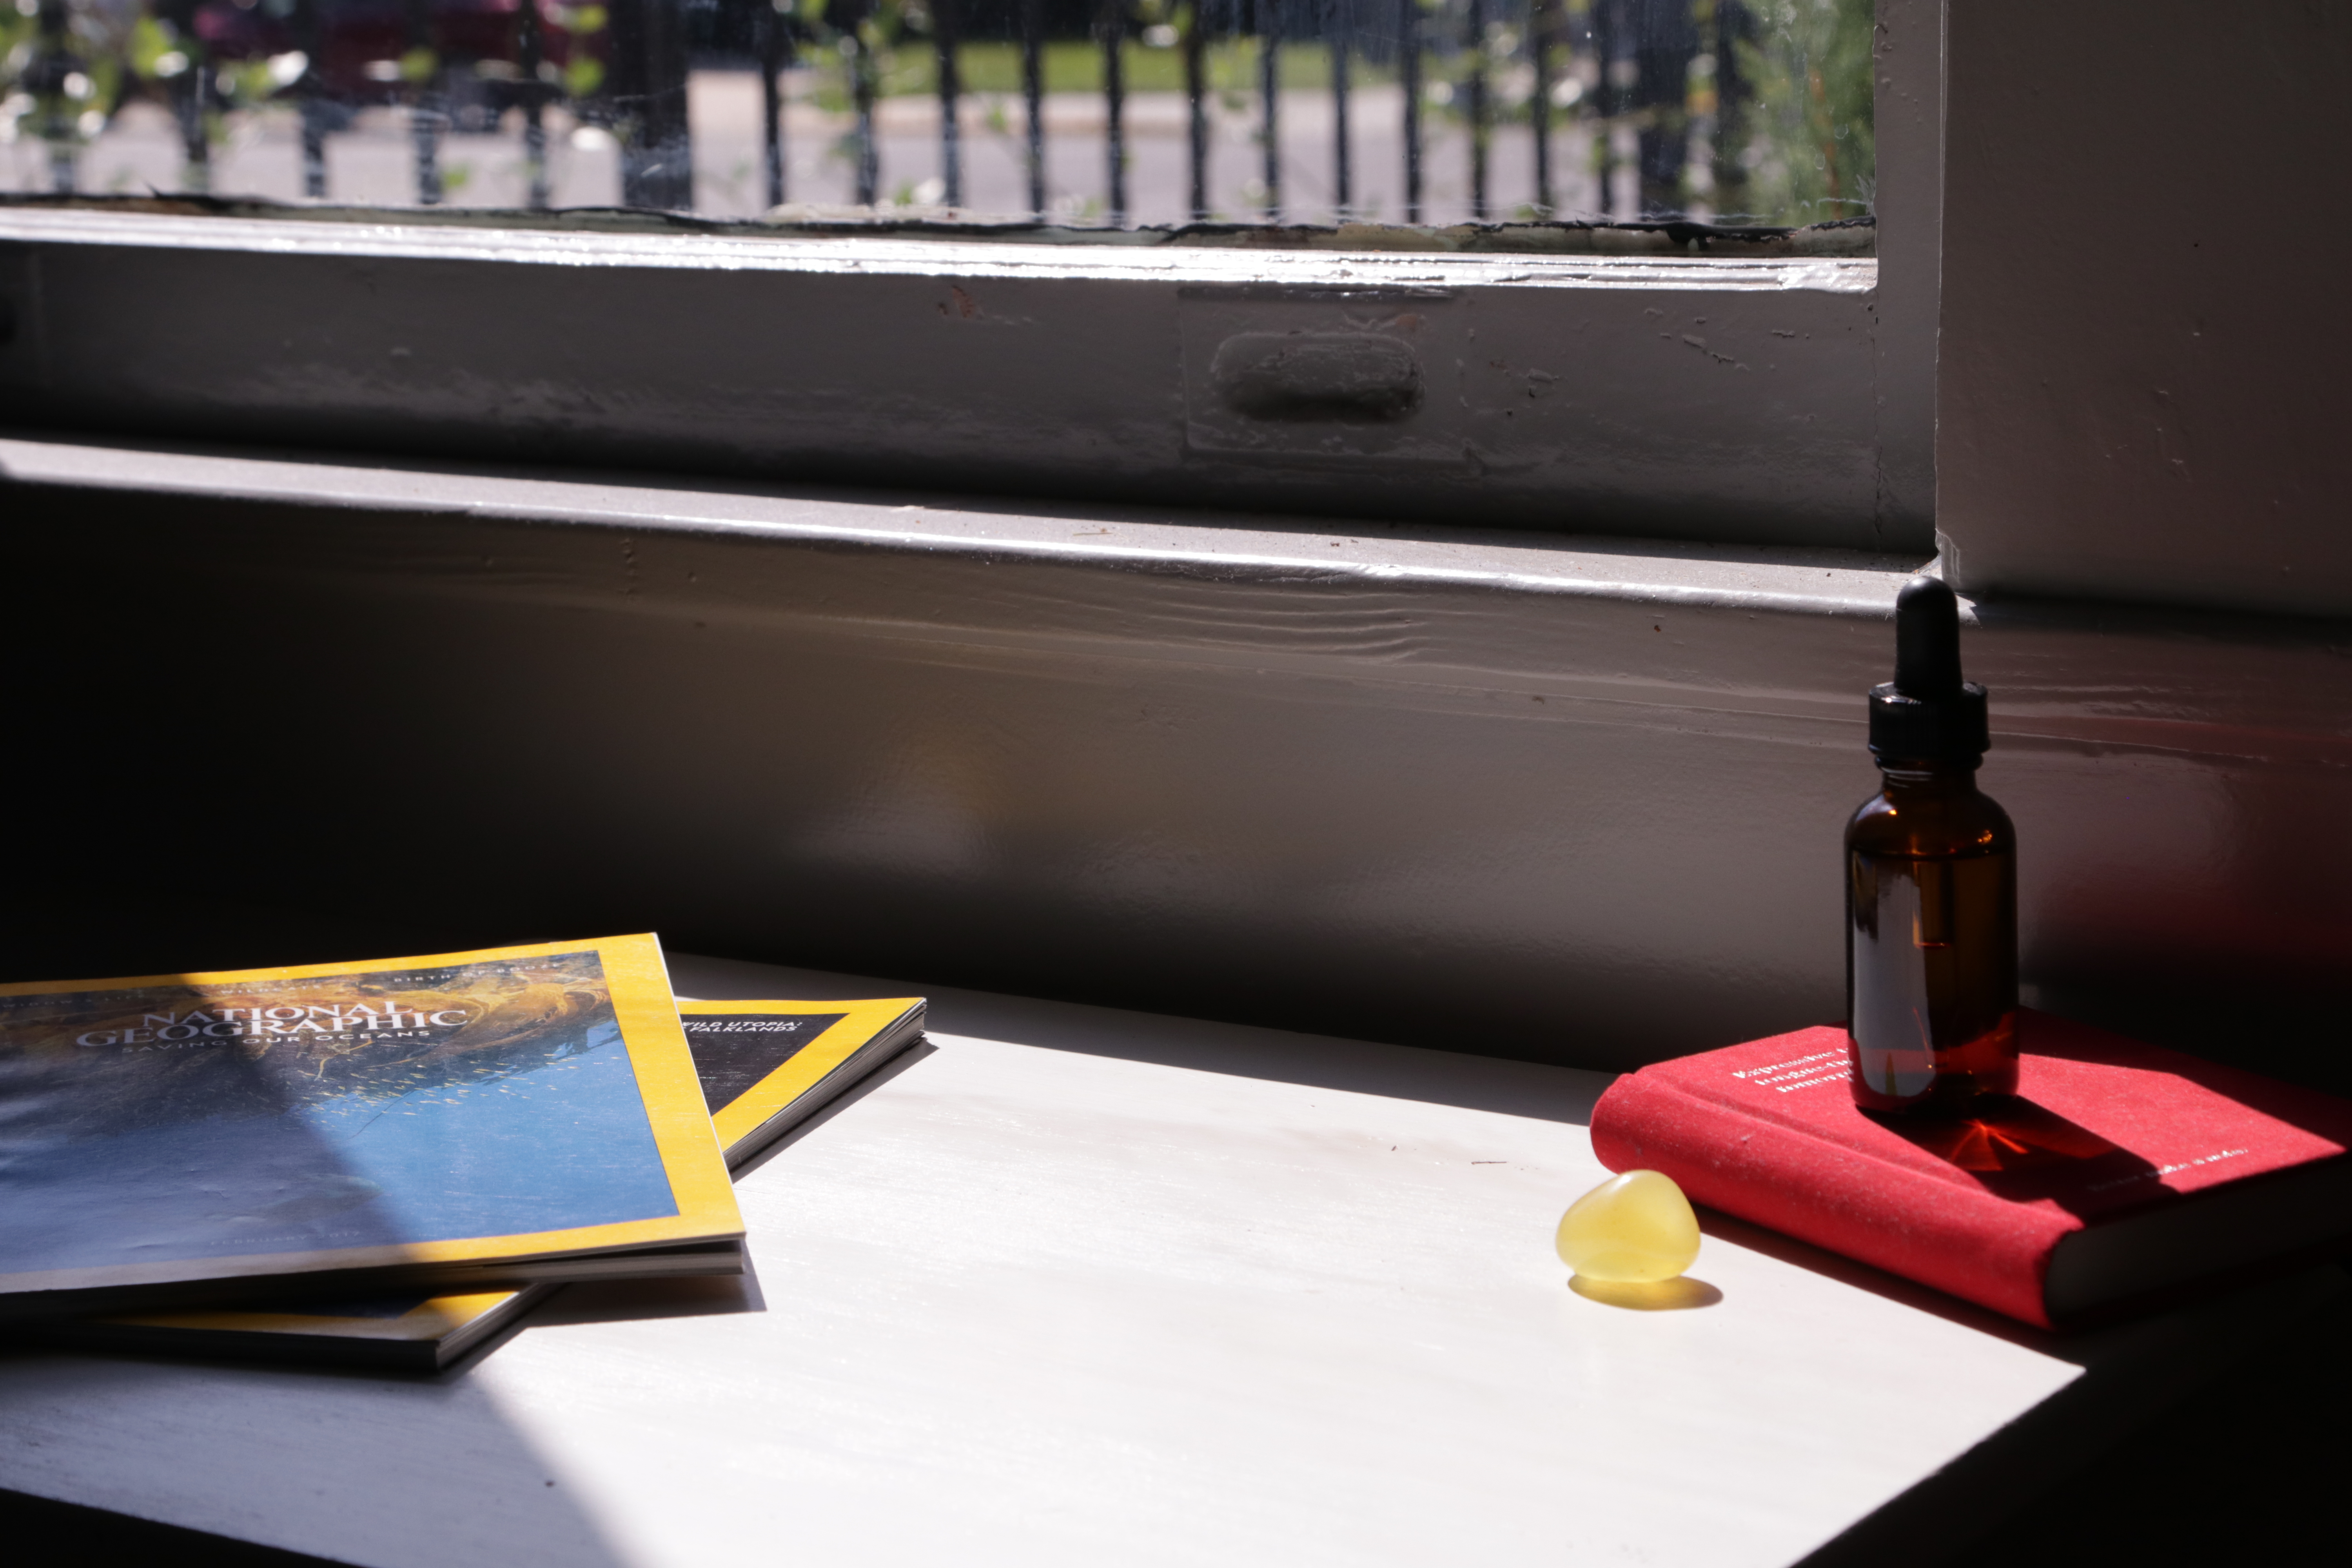
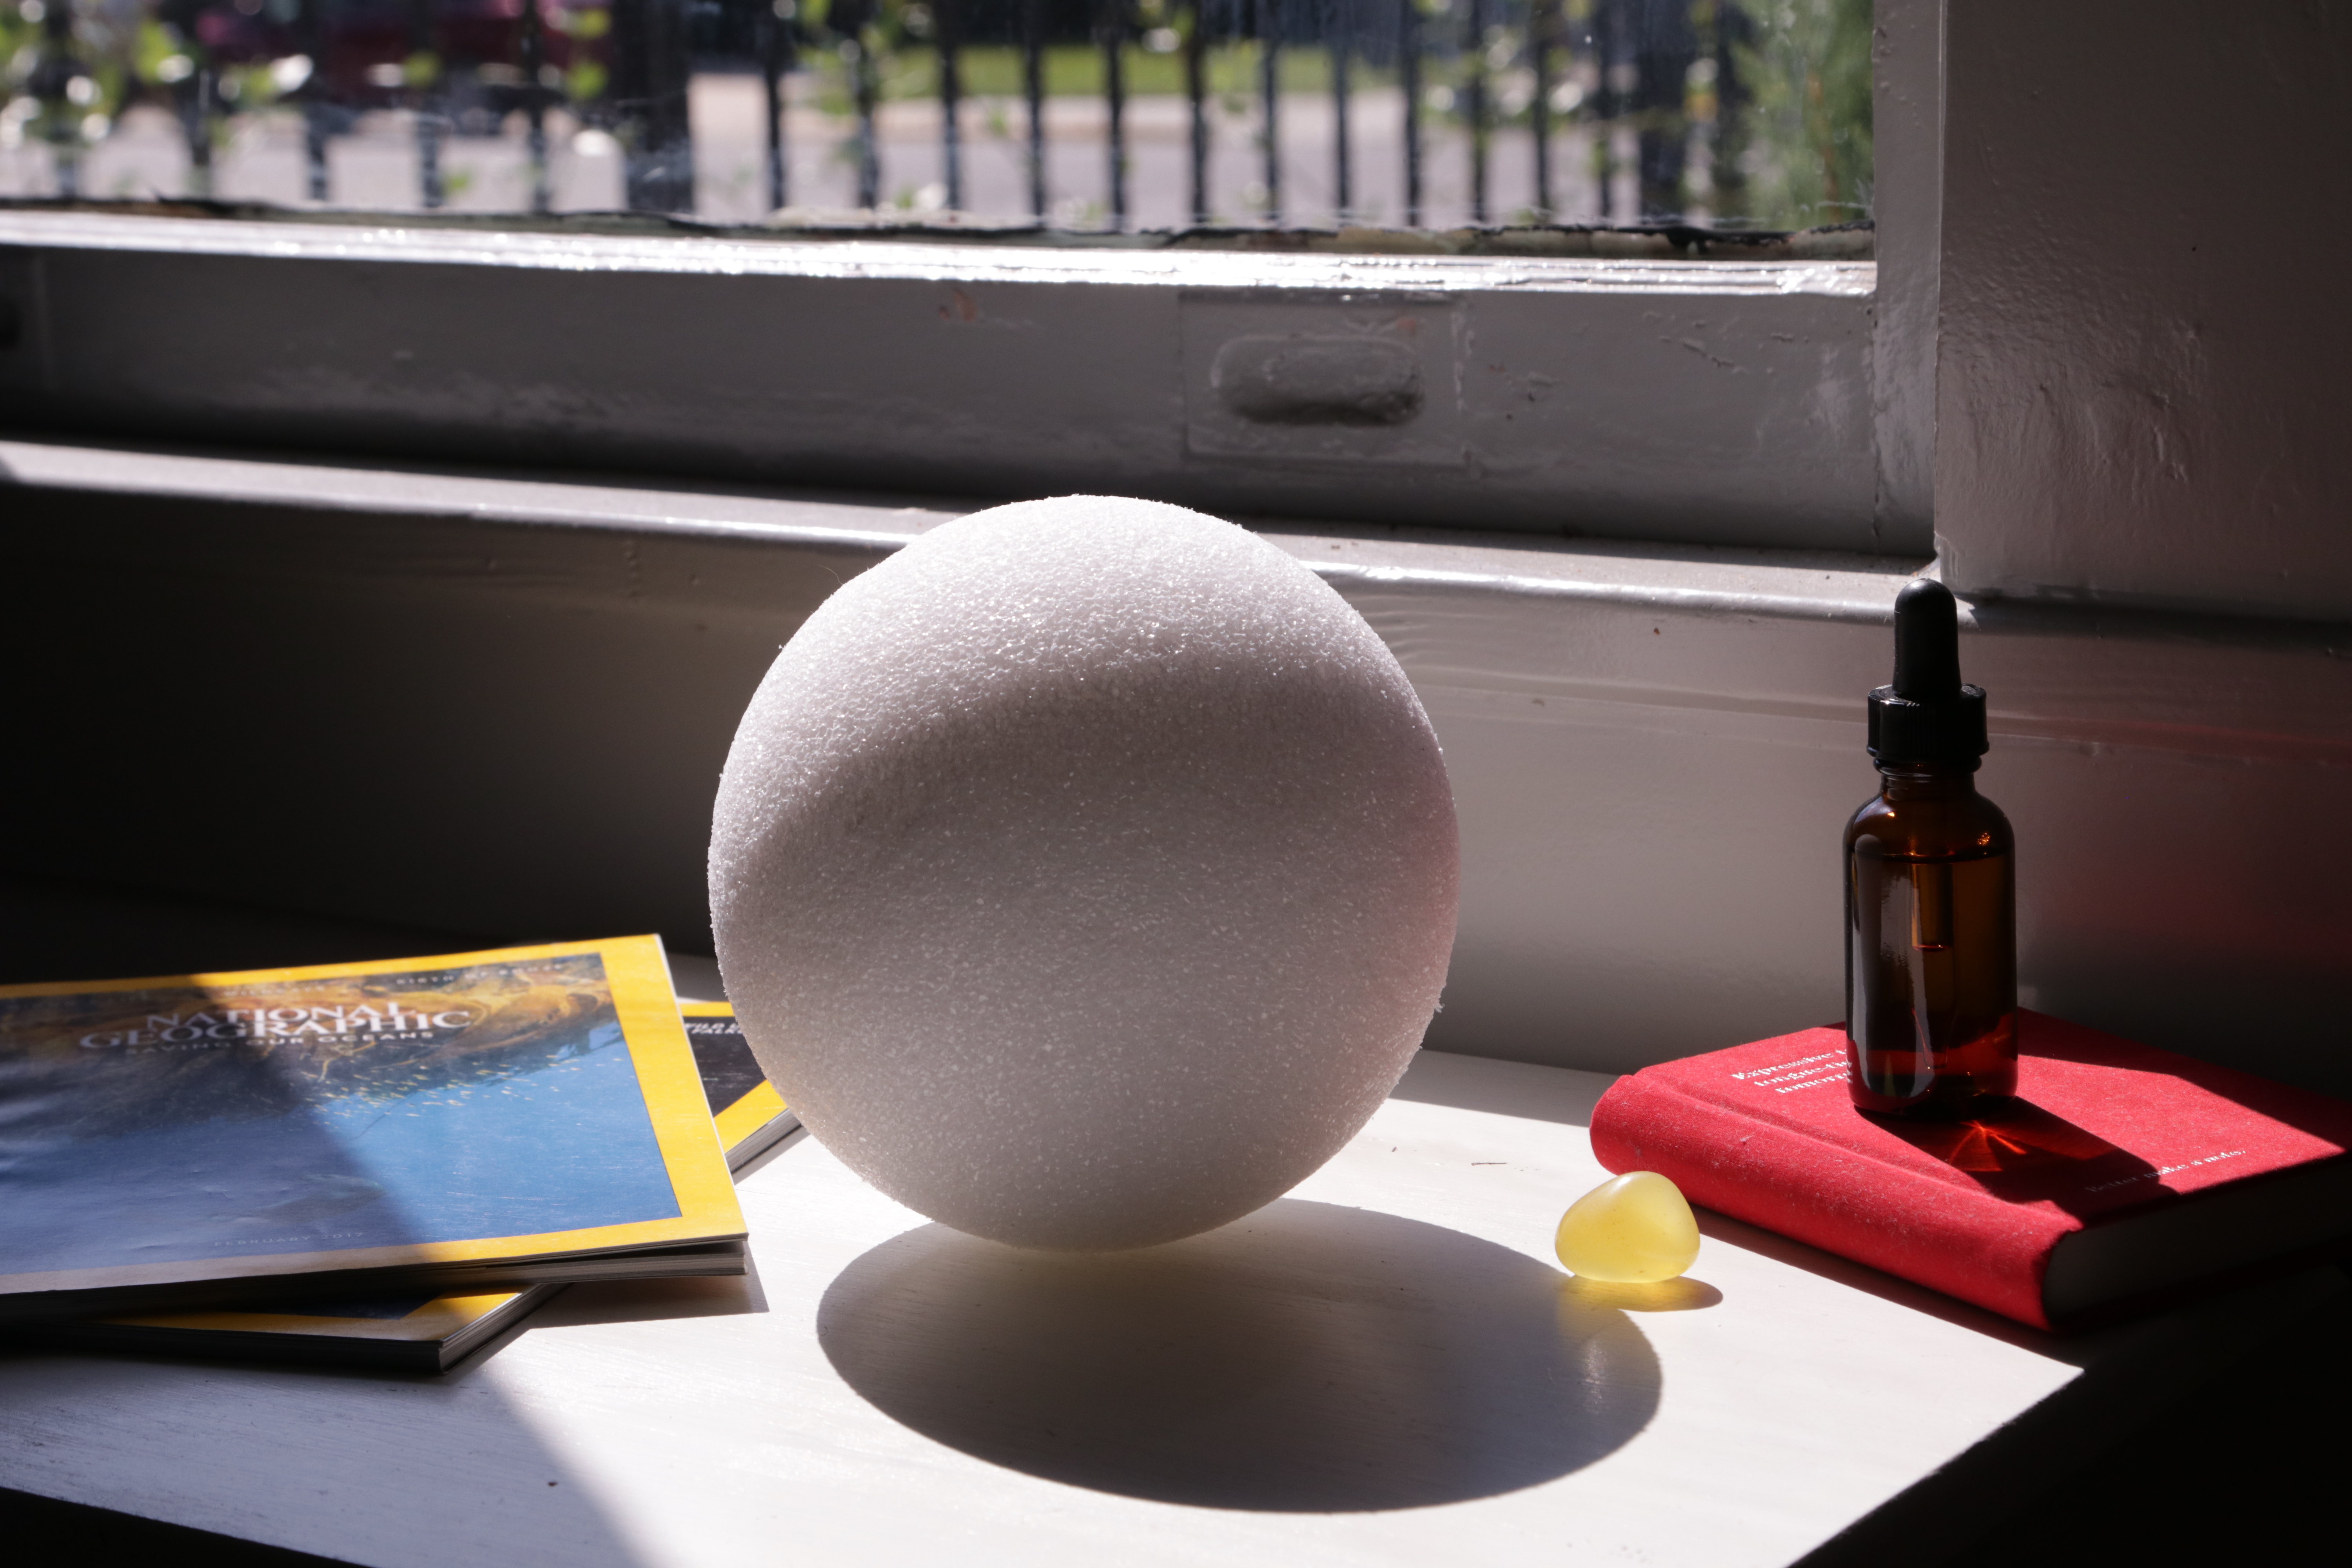
And my HDR, which I took with the Theta 360 again:
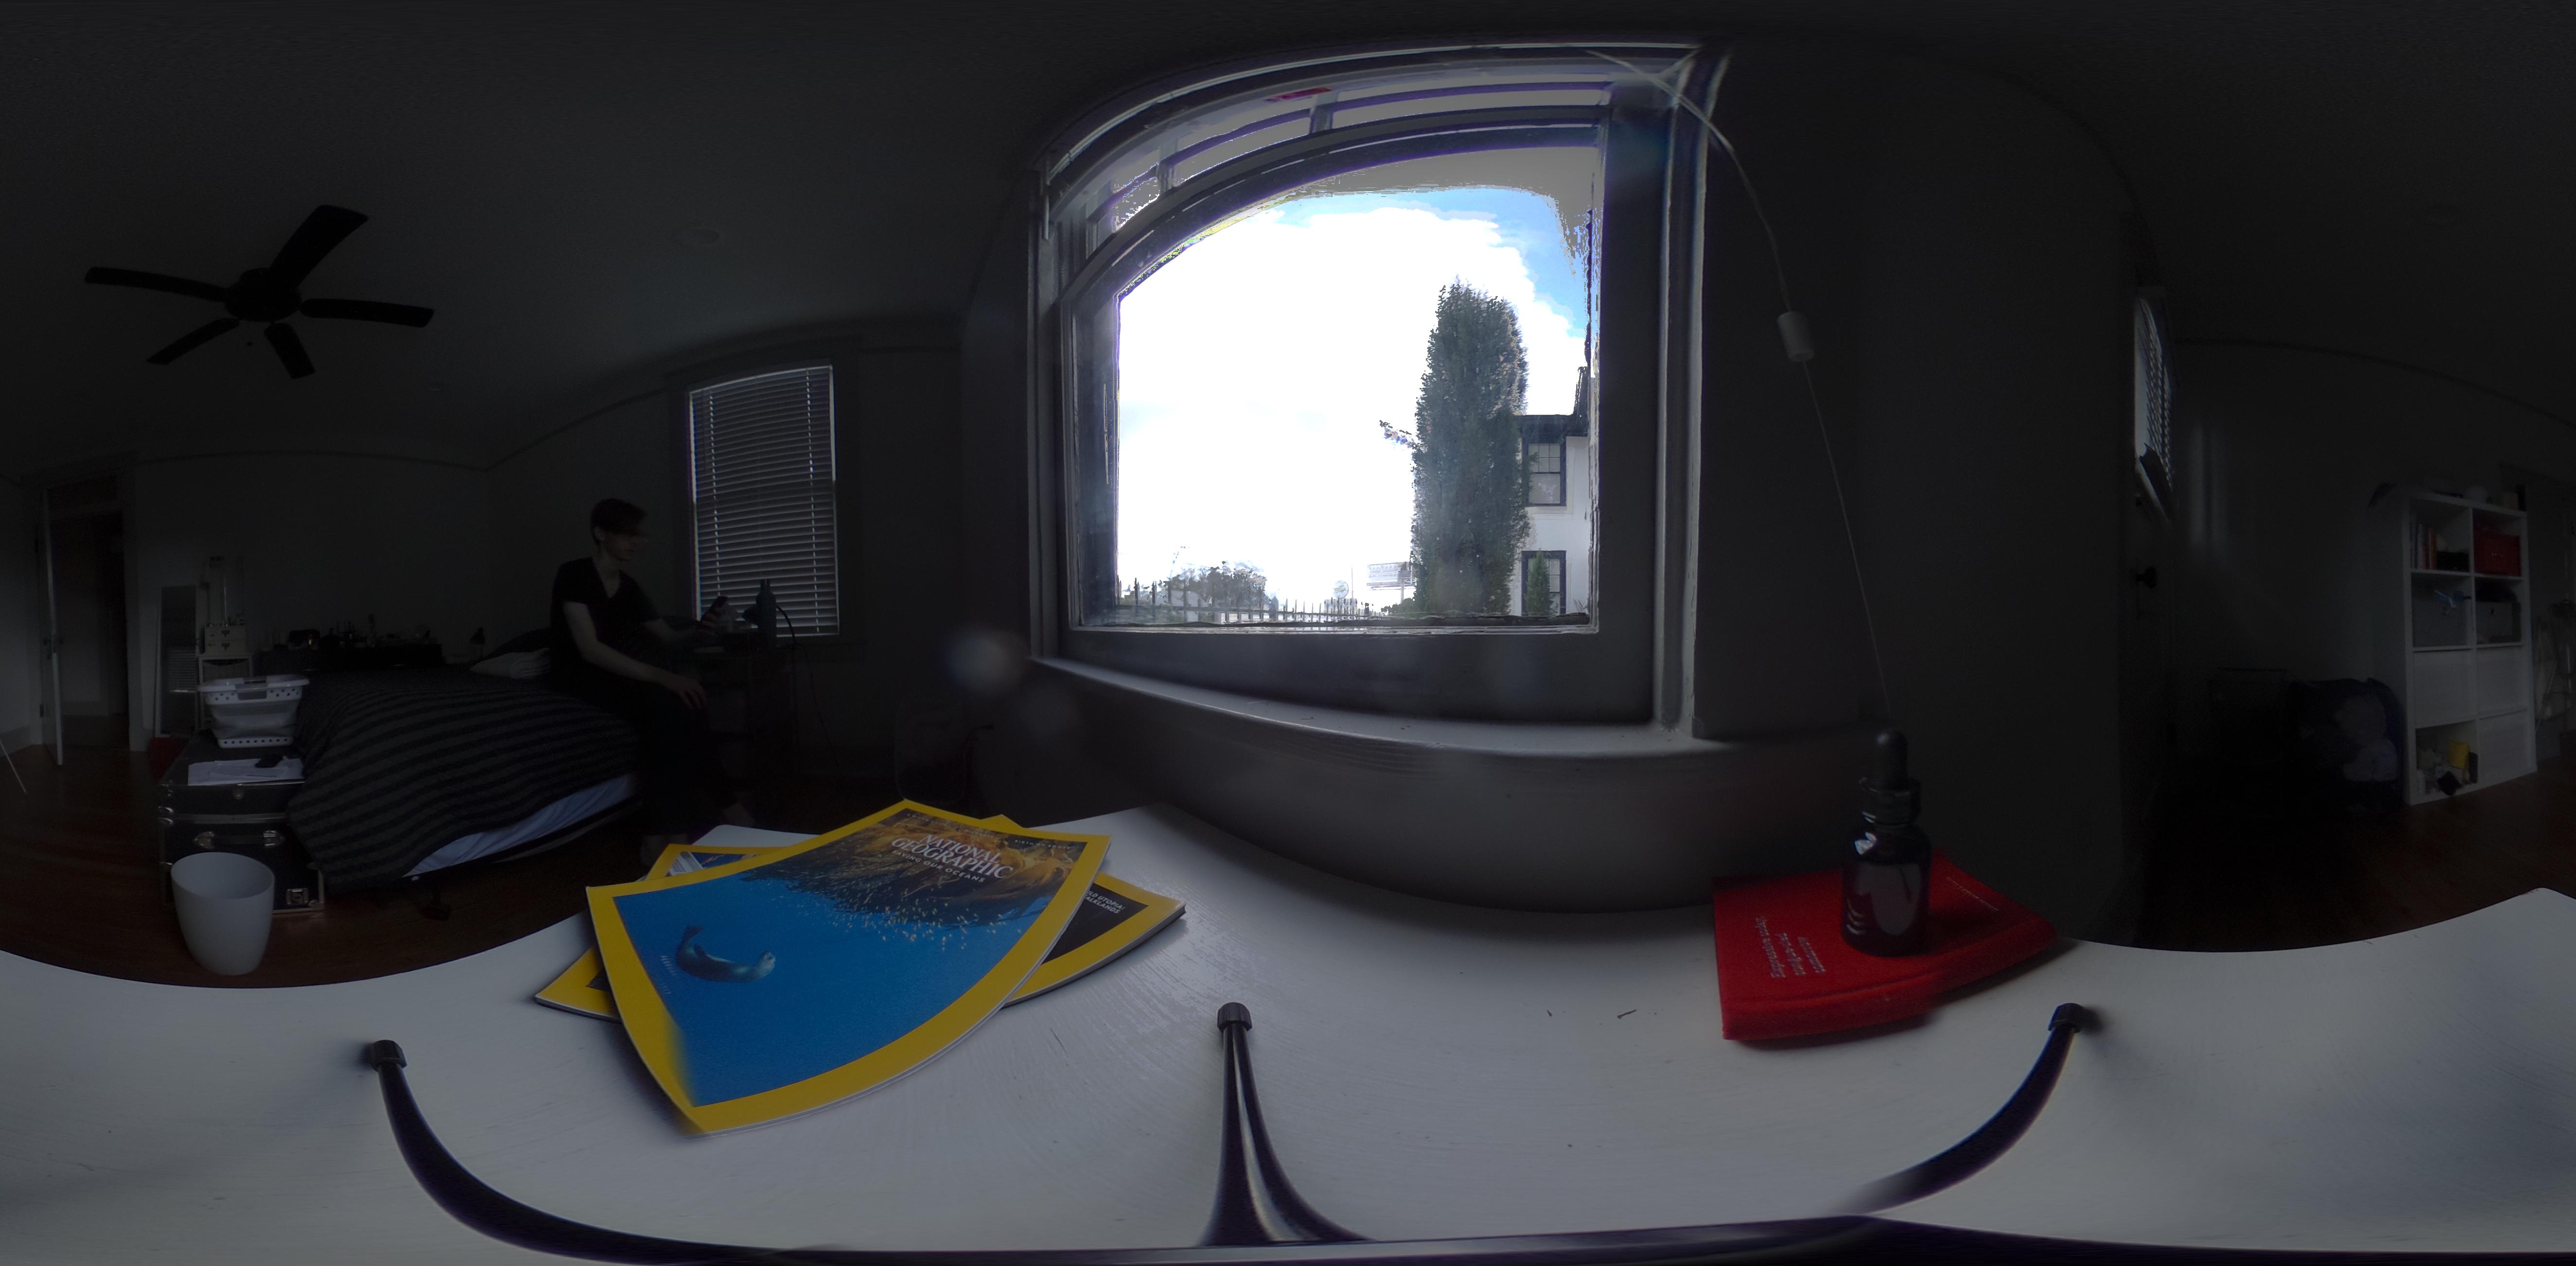
For my model, I selected the "Lucy" Stanford model since I think the thin wings will work well with the subsurface that my rock exhibits. Most of the work from here on out will be a combination of tweaking the shader in Maya, then seeing how that plays with the comp and then tweaking colors in
Nuke.
Here's my entire scene setup with the proxy geo and the Lucy model.
My shader ended up not actually being too complex. I chose to go with only subsurface since it didn't seem like translucency captured my rock's look.
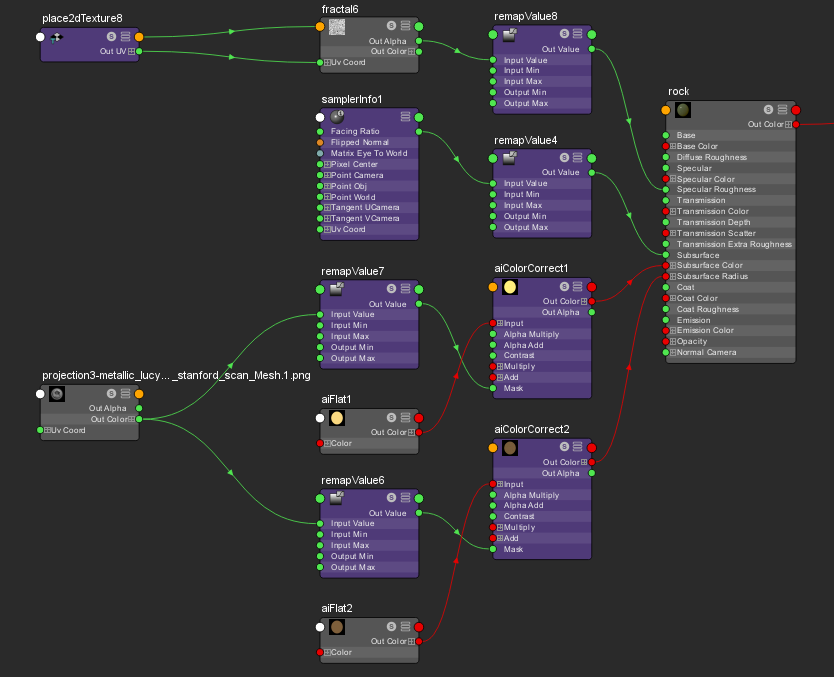
I used the facing ratio to control a bit of the SSS weight so that the object's opaque-ness would falloff around the edges. A simple remapped fractal was used for the spec weight, and I used a triplanar projected fractal to control the subsurface color and radius. This gives a bit of that darker yellow (almost green) variation that can be seen in the rock.
In order to get the triplanar projection to stick, I had to bake it out to the UVs as a texture map instead of a procedural. Here's how I did that:
This can be plugged into any field on the shader. Then go to Edit > Create File Texture (Maya Software) in Hypershade to save this based on the UVs. Since this model did not come UV'ed, I just quickly did an automatic UV so Maya would have something to bake the texture to.
Caustics
A big part of this rock shader should come from the caustics it throws out into the environment. Unfortunately, I don't think I was quite able to capture the same caustics that the rock has using Arnold's default caustic settings. To do this part, I made a new render layer with the statue, table, and key/fill lights.
I made a new shader for the statue that only had specularity and transmission since Arnold calculates caustics via these 2 parts of the shader. I made both colors yellow, turned on caustics in the "Advanced" tab of the shader, and this is what I got in the indirect_diffuse AOV:
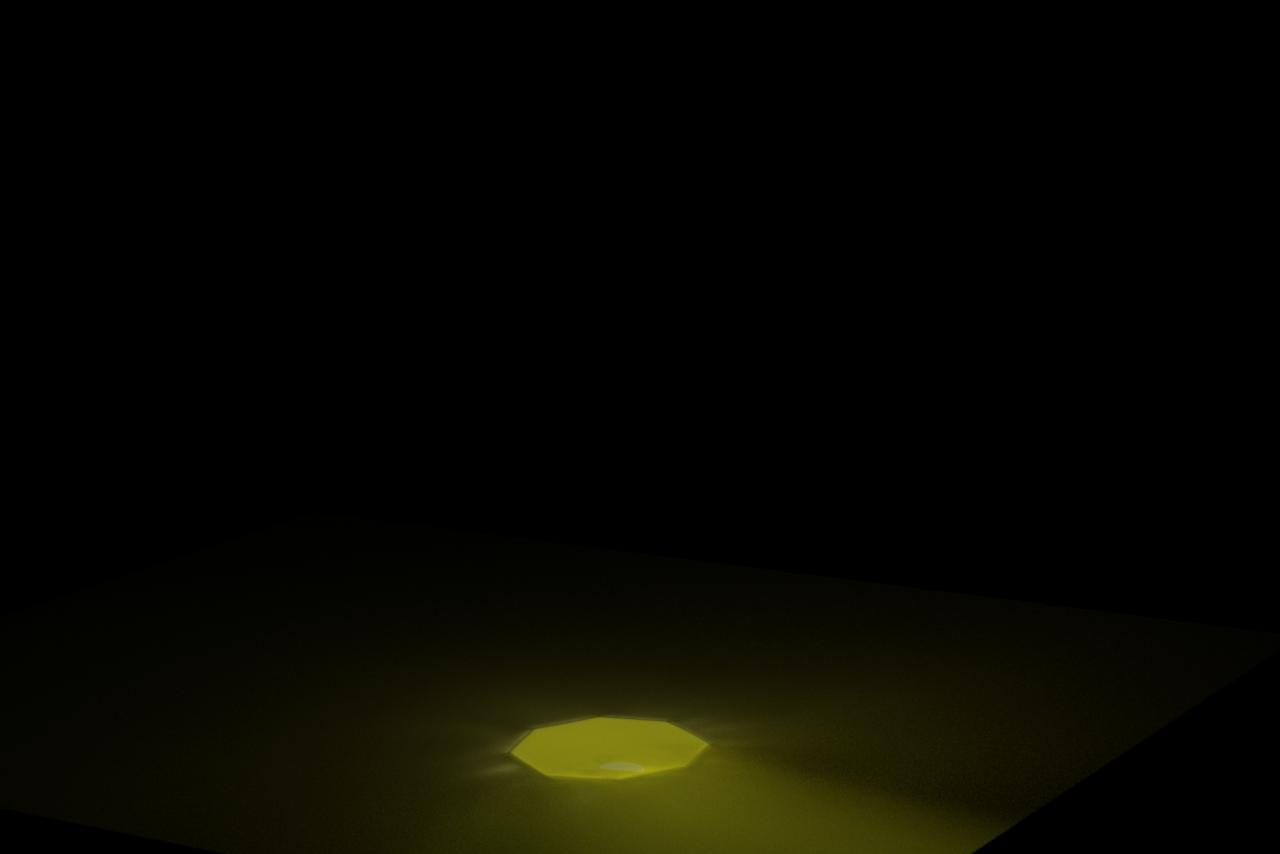
It's a step in the right direction, but it's not quite being thrown in the direction I would expect based on the reference rock. It seems that I would need another technique in order to do this properly.
Here's the caustic shader I used for only this render layer:
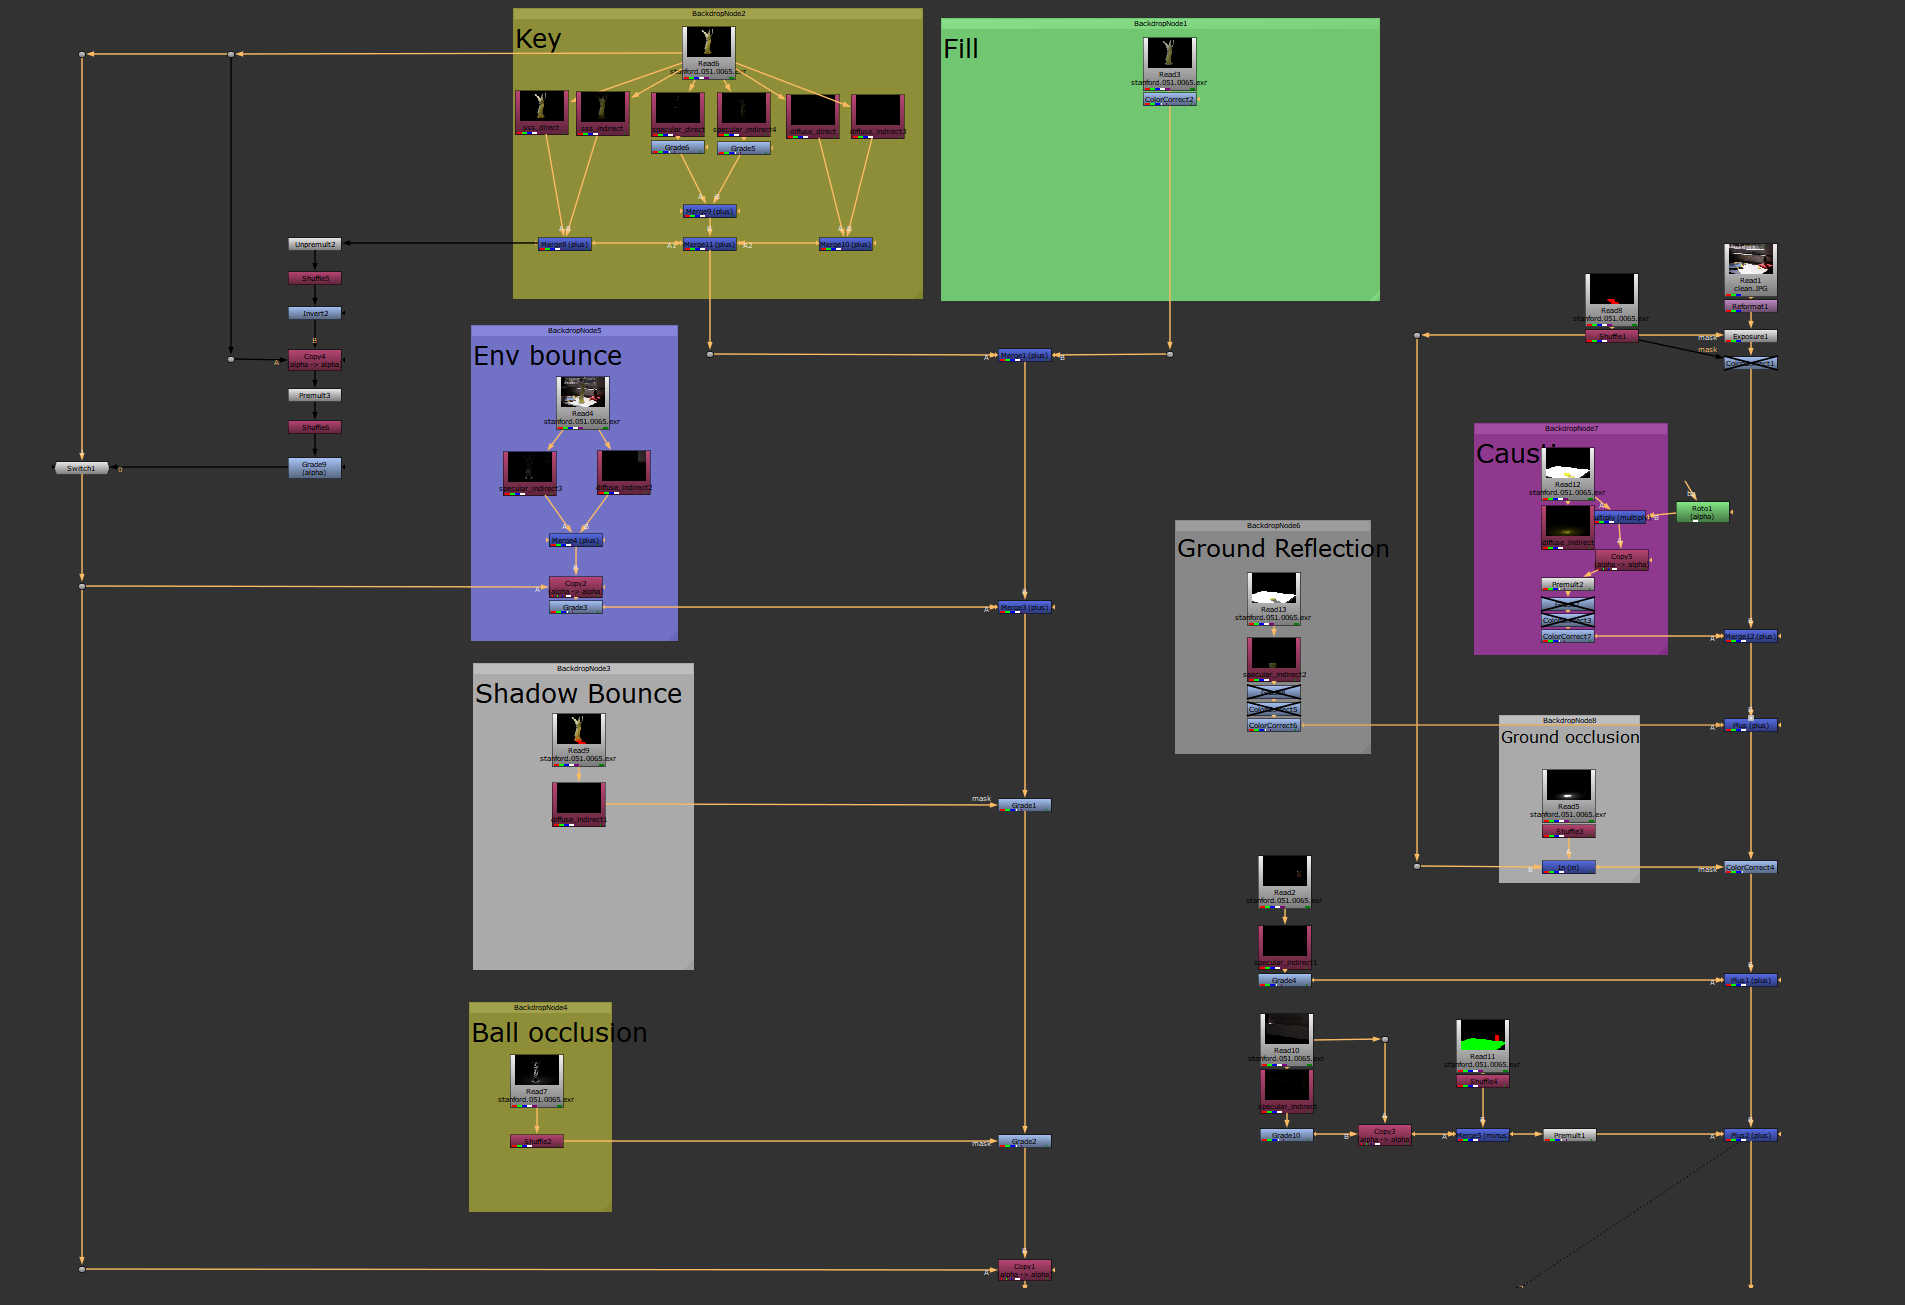
My comp is not extraordinarily complicated, just standard merging of the different render passes alongside some color corrections and grades for matching the reference.
Project 3 - AOV Splitter Tool
Week 1
For this final project, I was able to revamp an existing Nuke tool that I had developed previously. The goal of the tool is to quickly split out AOVs from a selected Read node. I already had the core functionality done, but I wanted to provide a UI for the users to interact with and select which AOVs they actually wanted to be split out. I also wanted to provide a way for the tool to automatically merge back the AOVs.
This is the UI I settled on:
The first box shows all the AOVs that are in the selected Read node's channels. The user can uncheck the ones they don't want to be extracted (shuffled out). The second box provides some options such as turning on thumbnails, adding grade nodes after each shuffle, and also merging all the extracted AOVs back together.
This allows the user to individually color correct an AOV before merging it back for the beauty result.
Week 2
I communicated with a classmate in order to see what sort of features would be useful in a tool like this for their workflow. Light group extraction seemed to be an important feature, so I started working on that.
I quickly realized that extracting light groups in a way that would be not only renderer-agnostic but also in a way that allowed them to be merged back together while affecting the other AOVs was going to be difficult. Particularly with Arnold, the light group comes as its own AOV, and each normal AOV also has a light group version. This means that any change I were to make to a light group AOV (such as a grade), would not propogate to the normal AOVs by default (since they are different channels).
I spent a lot of time troubleshooting and testing out some methods but nothing ever panned out from these explorations. I have kept that part of the code as WIP, but removed the light group related parts of the UI so I could provide a stable version of the tool to some users.
Week 3
This week I prepared a beta test for the class. I made a simple Google form and some instructions for installation and allowed the whole class to test out the tool and give me some feedback on its usage.
By far, the most requested feature was better organization of the nodes that are laid out. I spent the rest of the day on this node management and made the tool create some dot nodes to better organize all the connections from the initial Read node. Along with the automatically created Backdrop nodes, I think the output is quite slick. Here's the result of the splitting process:
Each of the selected AOVs are split out and grouped by their prefix (such as "specular"). This determines what backdrop the shuffles go in. When the user selects, "Add grade nodes," a grade node is added after ever shuffle automatically for the user.
For merging results, the script goes down the line and merges each subset group (i.e. "specular") and then merges each group into one another 1 at a time.
Final Thoughts
Based on the feedback I got, I want to spend some more time tweaking the placement of the nodes. The script could really benefit from placing the nodes with more spacing, but it is definitely trickier to pull off then what the current implementation does.
I also didn't get to add a feature to the UI which would allow the user to determine what order all the AOVs get split out into. This is something that I started working on, but have hidden from the UI since it is not 100% complete.
I'd also like to get light groups working so that the script splits those out first, allows for modifications, then merges back so that the AOVs can then be split out again.
Overall, I think this tool is really beneficial for lighters to quickly slap comp their renders. The survey results also speak to that since the feedback was really positive across the board.